In this chapter, we will see how to install Kubenetes via kubeadm. This is a tool which helps in the installation of Kubernetes. Let’s go step by step and learn how to install Kubernetes.
Step 1 − Ensure that the Ubuntu server version you are working on is 16.04.
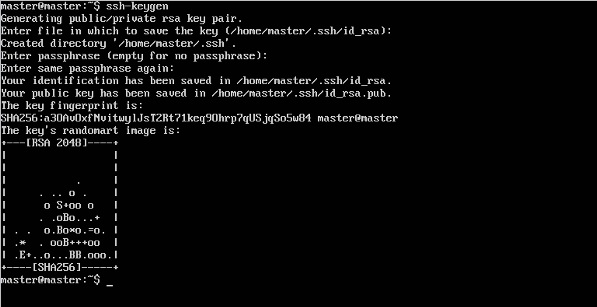
Step 2 − Ensure that you generate a ssh key which can be used for sshlogin. You can do this using the following command.
ssh-keygen
This will generate a key in your home folder as shown below.
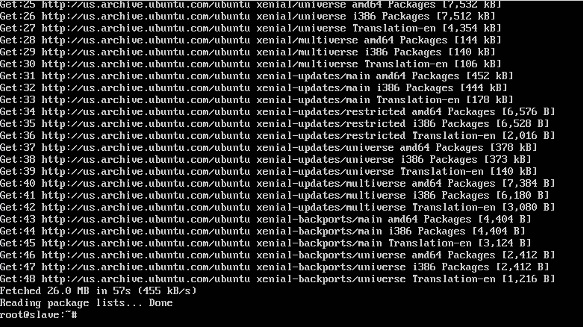
Step 3 − Next, depending on the version of Ubuntu you have, you will need to add the relevant site to the docker.list for the apt package manager, so that it will be able to detect the Kubernetes packages from the kubernetessite and download them accordingly.
We can do it using the following commands.
curl -s https://packages.cloud.google.com/apt/doc/apt-key.gpg | apt-key add -
echo "deb http://apt.kubernetes.io/ kubernetes-xenial main” | sudo tee /etc/apt/sources.list.d/docker.list
Step 4 − We then issue an apt-get update to ensure all packages are downloaded on the Ubuntu server.
Step 5 − Install the Docker package as detailed in the earlier chapters.
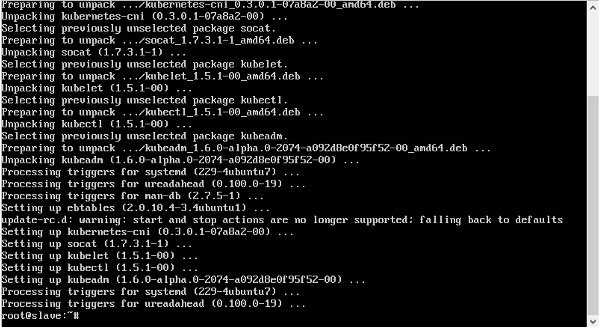
Step 6 − Now it’s time to install kubernetes by installing the following packages −
apt-get install –y kubelet kubeadm kubectl kubernetes-cni

Step 7 − Once all kubernetes packages are downloaded, it’s time to start the kubernetes controller using the following command −
kubeadm init
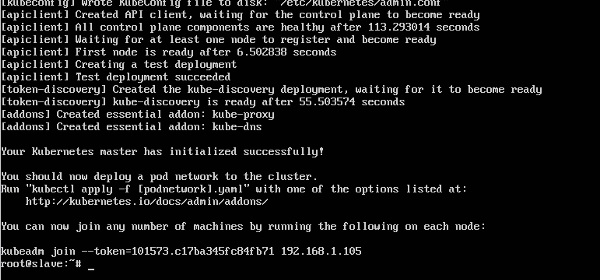
Once done, you will get a successful message that the master is up and running and nodes can now join the cluster.
No comments:
Post a Comment