Monday, 21 August 2023

A type-safe HTTP client for Android and Java

Retrofit

Introduction

Retrofit turns your HTTP API into a Java interface.

public interface GitHubService {
  @GET("users/{user}/repos")
  Call<List<Repo>> listRepos(@Path("user") String user);
}

The Retrofit class generates an implementation of the GitHubService interface.

Retrofit retrofit = new Retrofit.Builder()
    .baseUrl("https://api.github.com/")
    .build();

GitHubService service = retrofit.create(GitHubService.class);

Each Call from the created GitHubService can make a synchronous or asynchronous HTTP request to the remote webserver.

Call<List<Repo>> repos = service.listRepos("octocat");

Use annotations to describe the HTTP request:

  • URL parameter replacement and query parameter support
  • Object conversion to request body (e.g., JSON, protocol buffers)
  • Multipart request body and file upload

API Declaration

Annotations on the interface methods and its parameters indicate how a request will be handled.

REQUEST METHOD

Every method must have an HTTP annotation that provides the request method and relative URL. There are eight built-in annotations: HTTPGETPOSTPUTPATCHDELETEOPTIONS and HEAD. The relative URL of the resource is specified in the annotation.

@GET("users/list")

You can also specify query parameters in the URL.

@GET("users/list?sort=desc")

URL MANIPULATION

A request URL can be updated dynamically using replacement blocks and parameters on the method. A replacement block is an alphanumeric string surrounded by { and }. A corresponding parameter must be annotated with @Path using the same string.

@GET("group/{id}/users")
Call<List<User>> groupList(@Path("id") int groupId);

Query parameters can also be added.

@GET("group/{id}/users")
Call<List<User>> groupList(@Path("id") int groupId, @Query("sort") String sort);

For complex query parameter combinations a Map can be used.

@GET("group/{id}/users")
Call<List<User>> groupList(@Path("id") int groupId, @QueryMap Map<String, String> options);

REQUEST BODY

An object can be specified for use as an HTTP request body with the @Body annotation.

@POST("users/new")
Call<User> createUser(@Body User user);

The object will also be converted using a converter specified on the Retrofit instance. If no converter is added, only RequestBody can be used.

FORM ENCODED AND MULTIPART

Methods can also be declared to send form-encoded and multipart data.

Form-encoded data is sent when @FormUrlEncoded is present on the method. Each key-value pair is annotated with @Field containing the name and the object providing the value.

@FormUrlEncoded
@POST("user/edit")
Call<User> updateUser(@Field("first_name") String first, @Field("last_name") String last);

Multipart requests are used when @Multipart is present on the method. Parts are declared using the @Part annotation.

@Multipart
@PUT("user/photo")
Call<User> updateUser(@Part("photo") RequestBody photo, @Part("description") RequestBody description);

Multipart parts use one of Retrofit's converters or they can implement RequestBody to handle their own serialization.

HEADER MANIPULATION

You can set static headers for a method using the @Headers annotation.

@Headers("Cache-Control: max-age=640000")
@GET("widget/list")
Call<List<Widget>> widgetList();
@Headers({
    "Accept: application/vnd.github.v3.full+json",
    "User-Agent: Retrofit-Sample-App"
})
@GET("users/{username}")
Call<User> getUser(@Path("username") String username);

Note that headers do not overwrite each other. All headers with the same name will be included in the request.

A request Header can be updated dynamically using the @Header annotation. A corresponding parameter must be provided to the @Header. If the value is null, the header will be omitted. Otherwise, toString will be called on the value, and the result used.

@GET("user")
Call<User> getUser(@Header("Authorization") String authorization)

Similar to query parameters, for complex header combinations, a Map can be used.

@GET("user")
Call<User> getUser(@HeaderMap Map<String, String> headers)

Headers that need to be added to every request can be specified using an OkHttp interceptor.

SYNCHRONOUS VS. ASYNCHRONOUS

Call instances can be executed either synchronously or asynchronously. Each instance can only be used once, but calling clone() will create a new instance that can be used.

On Android, callbacks will be executed on the main thread. On the JVM, callbacks will happen on the same thread that executed the HTTP request.

Retrofit Configuration

Retrofit is the class through which your API interfaces are turned into callable objects. By default, Retrofit will give you sane defaults for your platform but it allows for customization.

CONVERTERS

By default, Retrofit can only deserialize HTTP bodies into OkHttp's ResponseBody type and it can only accept its RequestBody type for @Body.

Converters can be added to support other types. Six sibling modules adapt popular serialization libraries for your convenience.

  • Gsoncom.squareup.retrofit2:converter-gson
  • Jacksoncom.squareup.retrofit2:converter-jackson
  • Moshicom.squareup.retrofit2:converter-moshi
  • Protobufcom.squareup.retrofit2:converter-protobuf
  • Wirecom.squareup.retrofit2:converter-wire
  • Simple XMLcom.squareup.retrofit2:converter-simplexml
  • JAXBcom.squareup.retrofit2:converter-jaxb
  • Scalars (primitives, boxed, and String): com.squareup.retrofit2:converter-scalars

Here's an example of using the GsonConverterFactory class to generate an implementation of the GitHubService interface which uses Gson for its deserialization.

Retrofit retrofit = new Retrofit.Builder()
    .baseUrl("https://api.github.com/")
    .addConverterFactory(GsonConverterFactory.create())
    .build();

GitHubService service = retrofit.create(GitHubService.class);

CUSTOM CONVERTERS

If you need to communicate with an API that uses a content-format that Retrofit does not support out of the box (e.g. YAML, txt, custom format) or you wish to use a different library to implement an existing format, you can easily create your own converter. Create a class that extends the Converter.Factory class and pass in an instance when building your adapter.


For more reference: Retrofit (square.github.io)
Monday, 14 August 2023

Navigation drawer layout with an event listener

 Hey, today I am going to discuss Drawer Layout. This means you will get knowledge about how to add drawer layout with an event listener. The navigation drawer can be implemented by using the Drawer Layout widget. In the layout of your activity, you should define the DrawerLayout element.

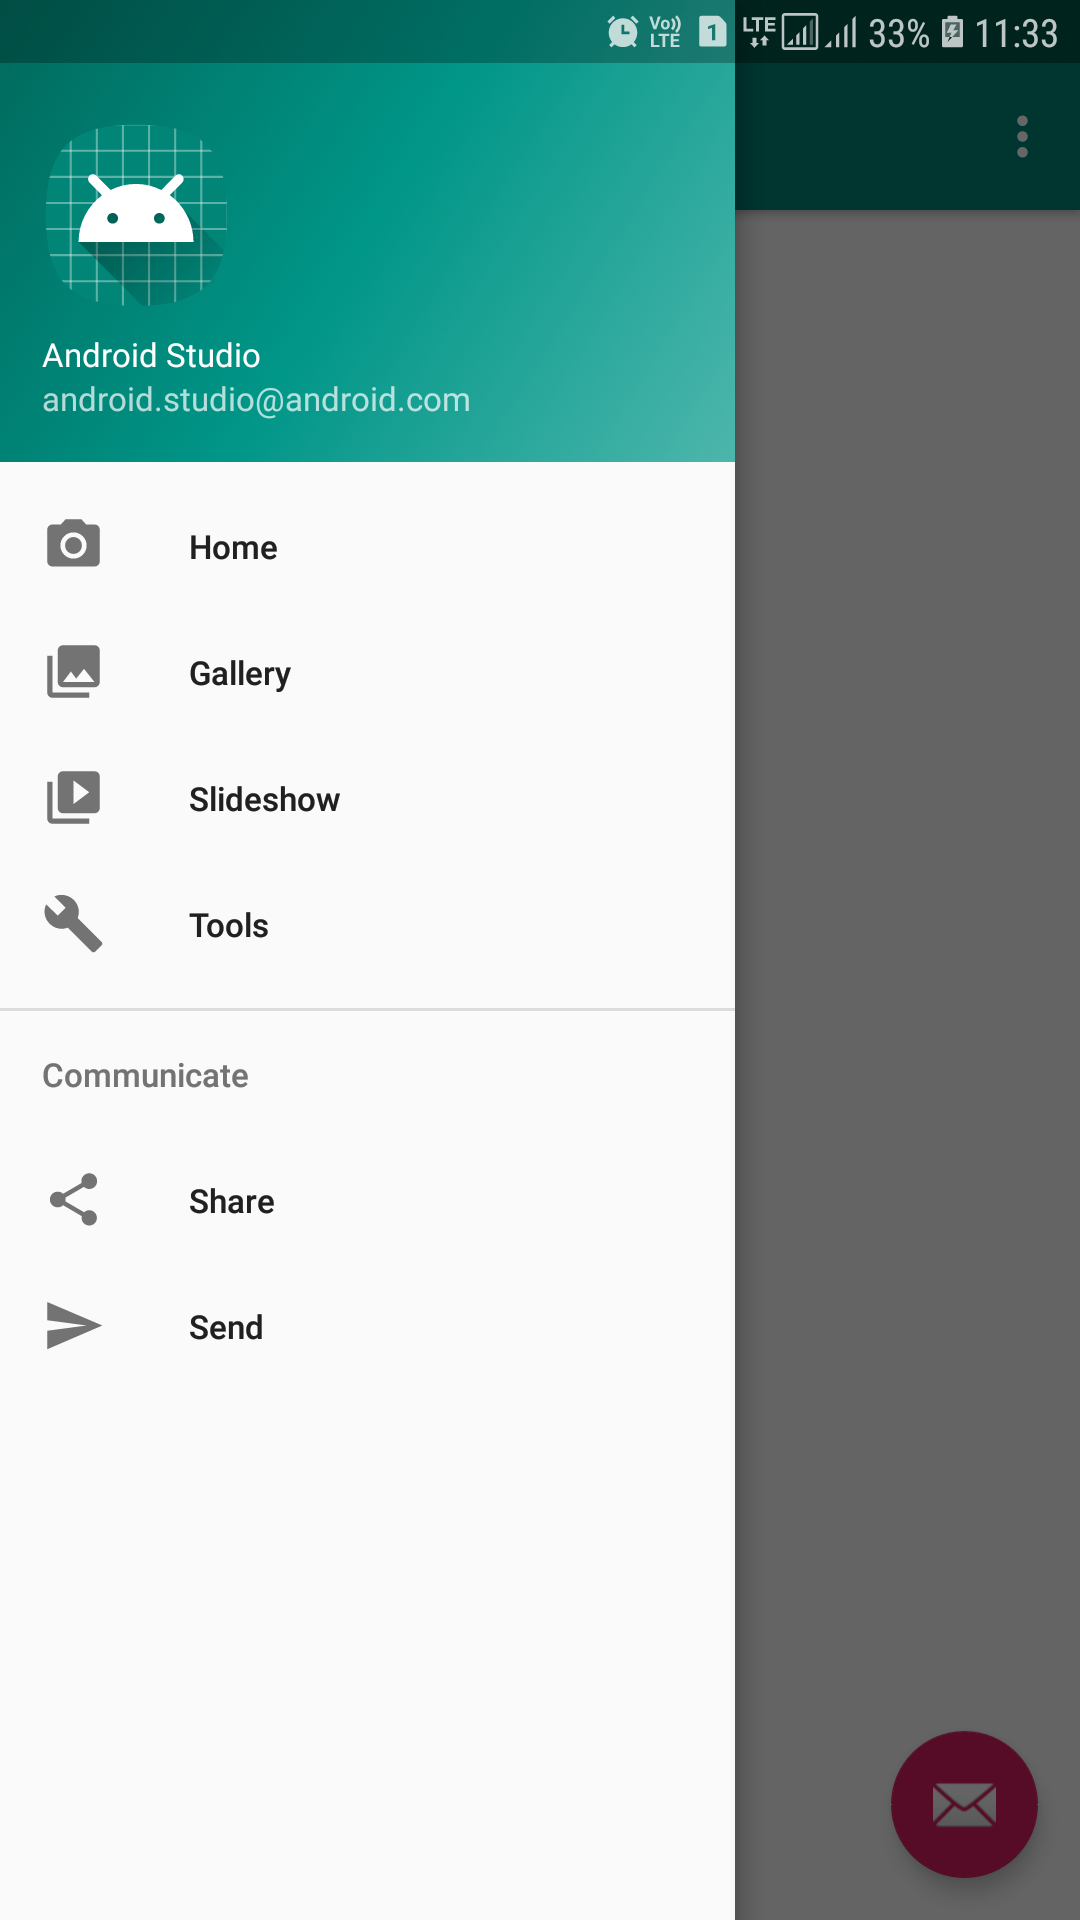
This is also known as the navigation drawer. This is a layout that displays the app’s main navigation options on the left edge of the right edge of the screen. Let's set up a basic navigation drawer based on the following steps with DrawerLayout.

What is the Drawer Layout?

As we discuss drawer layout acts as a top-level container for window content that allows for interactive drawer views to be pulled out from one or both vertical edges of the window. You can use it in your app either left edge or right edge. Mostly drawer layout is used on the left edge.

Create a Drawer Layout

Adding a navigation drawer, into the app is very simple. This is the top-level layout of the activity. You need to add this layout to your XML file. This XML file can be your activity file or fragment file.

Main XML Layouts

Let's take an example for the navigation drawer. First of all, add this XML snippet to your XML file.

<?xml version="1.0" encoding="utf-8"?>
<androidx.drawerlayout.widget.DrawerLayout xmlns:android="http://schemas.android.com/apk/res/android"
    xmlns:app="http://schemas.android.com/apk/res-auto"
    xmlns:tools="http://schemas.android.com/tools"
    android:id="@+id/drawer_layout"
    android:layout_width="match_parent"
    android:layout_height="match_parent"
    android:fitsSystemWindows="true"
    tools:openDrawer="start">

    <include
        layout="@layout/app_bar_main"
        android:layout_width="match_parent"
        android:layout_height="match_parent" />

    <com.google.android.material.navigation.NavigationView
        android:id="@+id/nav_view"
        android:layout_width="wrap_content"
        android:layout_height="match_parent"
        android:layout_gravity="start"
        android:fitsSystemWindows="true"
        app:headerLayout="@layout/nav_header_main"
        app:menu="@menu/activity_main_drawer" />

</androidx.drawerlayout.widget.DrawerLayout>

Header layout for the navigation drawer

Create a header layout for the navigation drawer now. This XML design will show on the top of the navigation drawer. You can customize with your own design patterns.

<?xml version="1.0" encoding="utf-8"?>
<LinearLayout xmlns:android="http://schemas.android.com/apk/res/android"
    xmlns:app="http://schemas.android.com/apk/res-auto"
    android:layout_width="match_parent"
    android:layout_height="@dimen/nav_header_height"
    android:background="@drawable/side_nav_bar"
    android:gravity="bottom"
    android:orientation="vertical"
    android:paddingLeft="@dimen/activity_horizontal_margin"
    android:paddingTop="@dimen/activity_vertical_margin"
    android:paddingRight="@dimen/activity_horizontal_margin"
    android:paddingBottom="@dimen/activity_vertical_margin"
    android:theme="@style/ThemeOverlay.AppCompat.Dark">

    <ImageView
        android:id="@+id/imageView"
        android:layout_width="wrap_content"
        android:layout_height="wrap_content"
        android:contentDescription="@string/nav_header_desc"
        android:paddingTop="@dimen/nav_header_vertical_spacing"
        app:srcCompat="@mipmap/ic_launcher_round" />

    <TextView
        android:layout_width="match_parent"
        android:layout_height="wrap_content"
        android:paddingTop="@dimen/nav_header_vertical_spacing"
        android:text="@string/nav_header_title"
        android:textAppearance="@style/TextAppearance.AppCompat.Body1" />

    <TextView
        android:id="@+id/textView"
        android:layout_width="wrap_content"
        android:layout_height="wrap_content"
        android:text="@string/nav_header_subtitle" />

</LinearLayout>

Menu for navigation layout

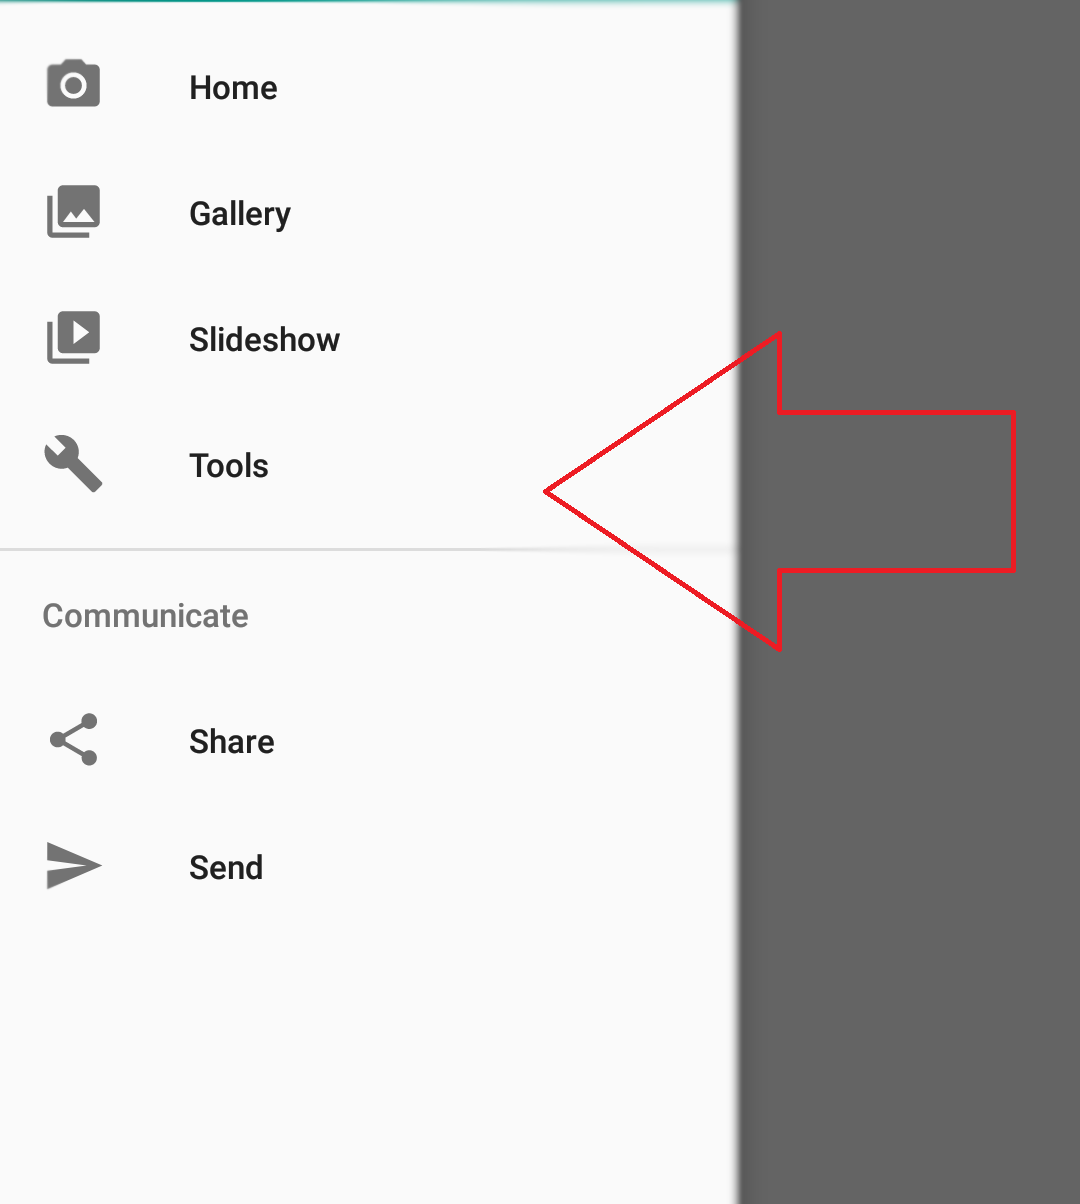
A most important segment of the navigation drawer is menu design. There are many two ways to design your menu, the first one is by using XML and second is dynamic via code. Sample for navigation menu like this by using XML.

<?xml version="1.0" encoding="utf-8"?>
<menu xmlns:android="http://schemas.android.com/apk/res/android"
    xmlns:tools="http://schemas.android.com/tools"
    tools:showIn="navigation_view">

    <group android:checkableBehavior="single">
        <item
            android:id="@+id/nav_home"
            android:icon="@drawable/ic_menu_camera"
            android:title="@string/menu_home" />
        <item
            android:id="@+id/nav_gallery"
            android:icon="@drawable/ic_menu_gallery"
            android:title="@string/menu_gallery" />
        <item
            android:id="@+id/nav_slideshow"
            android:icon="@drawable/ic_menu_slideshow"
            android:title="@string/menu_slideshow" />
        <item
            android:id="@+id/nav_tools"
            android:icon="@drawable/ic_menu_manage"
            android:title="@string/menu_tools" />
    </group>

    <item android:title="Communicate">
        <menu>
            <item
                android:id="@+id/nav_share"
                android:icon="@drawable/ic_menu_share"
                android:title="@string/menu_share" />
            <item
                android:id="@+id/nav_send"
                android:icon="@drawable/ic_menu_send"
                android:title="@string/menu_send" />
        </menu>
    </item>

</menu>

How to access navigation layout by activity?

Now, these are the code snippets where you handle your drawer layout with an event listener. You can access your drawer layout activity as well as your drawer layout menu. You just need to create your drawer layout object in your activity to access all features of the drawer layout.

DrawerLayout drawer = findViewById(R.id.drawer_layout);
NavigationView navigationView = findViewById(R.id.nav_view);
ActionBarDrawerToggle toggle = new ActionBarDrawerToggle(
                this, drawer, toolbar, R.string.navigation_drawer_open, R.string.navigation_drawer_close);
drawer.addDrawerListener(toggle);
toggle.syncState();
navigationView.setNavigationItemSelectedListener(this);

On navigation item select

Now, you need to add code for controlling your menu options. So, add the onNavigationItemSelected function in your activity.

@Override
    public boolean onNavigationItemSelected(MenuItem item) {
        // Handle navigation view item clicks here.
        int id = item.getItemId();

        if (id == R.id.nav_home) {
            // Handle the camera action
        } else if (id == R.id.nav_gallery) {

        } else if (id == R.id.nav_slideshow) {

        } else if (id == R.id.nav_tools) {

        } else if (id == R.id.nav_share) {

        } else if (id == R.id.nav_send) {

        }

        DrawerLayout drawer = findViewById(R.id.drawer_layout);
        drawer.closeDrawer(GravityCompat.START);
        return true;
    }

Drawer layout with an event listener

Finally, this is the code where you can detect your drawer layout is open or closed with an event listener.

drawer.addDrawerListener(new DrawerLayout.DrawerListener() {
            @Override
            public void onDrawerSlide(View drawerView, float slideOffset) {
                //Log.i(TAG, "onDrawerSlide");
            }

            @Override
            public void onDrawerOpened(View drawerView) {
                Log.i(TAG, "onDrawerOpened");
            }

            @Override
            public void onDrawerClosed(View drawerView) {
                Log.i(TAG, "onDrawerClosed");
            }

            @Override
            public void onDrawerStateChanged(int newState) {
                //Log.i(TAG, "onDrawerStateChanged");
            }
        });

Final code for drawer layout with an event listener

package com.codingissue.example;

import android.os.Bundle;

import com.google.android.material.floatingactionbutton.FloatingActionButton;
import com.google.android.material.snackbar.Snackbar;

import android.util.Log;
import android.view.View;

import androidx.core.view.GravityCompat;
import androidx.appcompat.app.ActionBarDrawerToggle;

import android.view.MenuItem;

import com.google.android.material.navigation.NavigationView;

import androidx.drawerlayout.widget.DrawerLayout;

import androidx.appcompat.app.AppCompatActivity;
import androidx.appcompat.widget.Toolbar;

import android.view.Menu;

public class MainActivity extends AppCompatActivity
        implements NavigationView.OnNavigationItemSelectedListener {

    private String TAG = "MainActivity";

    @Override
    protected void onCreate(Bundle savedInstanceState) {
        super.onCreate(savedInstanceState);
        setContentView(R.layout.activity_main);
        Toolbar toolbar = findViewById(R.id.toolbar);
        setSupportActionBar(toolbar);
        FloatingActionButton fab = findViewById(R.id.fab);
        fab.setOnClickListener(new View.OnClickListener() {
            @Override
            public void onClick(View view) {
                Snackbar.make(view, "Replace with your own action", Snackbar.LENGTH_LONG)
                        .setAction("Action", null).show();
            }
        });
        DrawerLayout drawer = findViewById(R.id.drawer_layout);
        NavigationView navigationView = findViewById(R.id.nav_view);
        ActionBarDrawerToggle toggle = new ActionBarDrawerToggle(
                this, drawer, toolbar, R.string.navigation_drawer_open, R.string.navigation_drawer_close);
        drawer.addDrawerListener(toggle);
        toggle.syncState();
        navigationView.setNavigationItemSelectedListener(this);

        drawer.addDrawerListener(new DrawerLayout.DrawerListener() {
            @Override
            public void onDrawerSlide(View drawerView, float slideOffset) {
                //Log.i(TAG, "onDrawerSlide");
            }

            @Override
            public void onDrawerOpened(View drawerView) {
                Log.i(TAG, "onDrawerOpened");
            }

            @Override
            public void onDrawerClosed(View drawerView) {
                Log.i(TAG, "onDrawerClosed");
            }

            @Override
            public void onDrawerStateChanged(int newState) {
                //Log.i(TAG, "onDrawerStateChanged");
            }
        });
    }

    @Override
    public void onBackPressed() {
        DrawerLayout drawer = findViewById(R.id.drawer_layout);
        if (drawer.isDrawerOpen(GravityCompat.START)) {
            drawer.closeDrawer(GravityCompat.START);
        } else {
            super.onBackPressed();
        }
    }

    @Override
    public boolean onCreateOptionsMenu(Menu menu) {
        // Inflate the menu; this adds items to the action bar if it is present.
        getMenuInflater().inflate(R.menu.main, menu);
        return true;
    }

    @Override
    public boolean onOptionsItemSelected(MenuItem item) {
        // Handle action bar item clicks here. The action bar will
        // automatically handle clicks on the Home/Up button, so long
        // as you specify a parent activity in AndroidManifest.xml.
        int id = item.getItemId();

        //noinspection SimplifiableIfStatement
        if (id == R.id.action_settings) {
            return true;
        }

        return super.onOptionsItemSelected(item);
    }

    @SuppressWarnings("StatementWithEmptyBody")
    @Override
    public boolean onNavigationItemSelected(MenuItem item) {
        // Handle navigation view item clicks here.
        int id = item.getItemId();

        if (id == R.id.nav_home) {
            // Handle the camera action
        } else if (id == R.id.nav_gallery) {

        } else if (id == R.id.nav_slideshow) {

        } else if (id == R.id.nav_tools) {

        } else if (id == R.id.nav_share) {

        } else if (id == R.id.nav_send) {

        }

        DrawerLayout drawer = findViewById(R.id.drawer_layout);
        drawer.closeDrawer(GravityCompat.START);
        return true;
    }
}

Conclusion

In the above post, we learn about the navigation drawer layout with an event listener. We also learned drawer layout can be adjusted on the left edge and right edge of the screen. We can detect navigation item click as well as navigation movement.

Friday, 4 August 2023

Retrofit 2 – Synchronous and Asynchronous Calls

 Learn to execute synchronous and asynchronous calls (i.e. blocking and non-blocking calls) in an android app using Retrofit2 and OkHttp library.

1. Call.execute() and Call.enqueue() Methods

In Retrofit 2, all requests are wrapped into a retrofit2.Call object. Each call yields its own HTTP request and response pair.

Call interface provides two methods for making the HTTP requests:

  • execute() – Synchronously send the request and return its response.
  • enqueue(retrofit2.Callback) – Asynchronously send the request and notify callback of its response or if an error occurred talking to the server, creating the request, or processing the response.

2. Retrofit Call Examples

2.1. Synchronous Call Example (Not recommended)

In synchronous calls, the request is sent using the execute() method and the request is blocked and the response is available immediately to the next statement.

In retrofit, synchronous methods are executed in the main thread. This means that the UI is blocked during the synchronous request execution and no user interaction is possible in this period.

Synchronous Request Example
UserService service = ServiceGenerator.createService(UserService.class); // 1. Calling '/api/users/2' - synchronously Call<UserApiResponse> callSync = service.getUser(2); try { Response<UserApiResponse> response = callSync.execute(); UserApiResponse apiResponse = response.body(); //API response System.out.println(apiResponse); } catch (Exception ex) { ex.printStackTrace(); }

In the above example, we have used the ServiceGenerator class. We have used ServiceGenerator class for having a centralized place to add/modify the authentication, logging and error handling logic.

ServiceGenerator.java
import okhttp3.OkHttpClient; import okhttp3.logging.HttpLoggingInterceptor; import retrofit2.Retrofit; import retrofit2.converter.gson.GsonConverterFactory; public class ServiceGenerator { private static final String BASE_URL = "https://reqres.in/"; private static Retrofit.Builder builder = new Retrofit.Builder() .baseUrl(BASE_URL) .addConverterFactory(GsonConverterFactory.create()); private static Retrofit retrofit = builder.build(); private static HttpLoggingInterceptor loggingInterceptor = new HttpLoggingInterceptor() .setLevel(HttpLoggingInterceptor.Level.BASIC); private static OkHttpClient.Builder httpClient = new OkHttpClient.Builder(); public static <S> S createService(Class<S> serviceClass) { if (!httpClient.interceptors().contains(loggingInterceptor)) { httpClient.addInterceptor(loggingInterceptor); builder.client(httpClient.build()); } return retrofit.create(serviceClass); } }

2.2. Asynchronous Call Example (Recommended)

Asynchronous calls should be made for non-blocking UI. In this way, android executes the request in a separate thread and does not block the main thread.

It means the user can still interact with the app while waiting for the response.

Asynchronous request example
UserService service = ServiceGenerator.createService(UserService.class); // 2. Calling '/api/users/2' - asynchronously Call<UserApiResponse> callAsync = service.getUser(2); callAsync.enqueue(new Callback<UserApiResponse>() { @Override public void onResponse(Call<UserApiResponse> call, Response<UserApiResponse> response) { if (response.isSuccessful()) { UserApiResponse apiResponse = response.body(); //API response System.out.println(apiResponse); } else { System.out.println("Request Error :: " + response.errorBody()); } } @Override public void onFailure(Call<UserApiResponse> call, Throwable t) { System.out.println("Network Error :: " + t.getLocalizedMessage()); } });

Drop me your questions related to executing blocking and non-blocking calls in Retrofit 2.