The ASP.NET Core Identity is a membership system, which allows us to add authentication and authorization functionality to our Application. A user can create his/her own account with it and access the system, which is based on his/her roles or claims. It can configure with SQL Server database. It also provides the features to authenticate a user, which is based on his/her external login providers such as Facebook Google, Twitter etc.
The authentication means who is the user. It is the process of verifying the identity of a user by the credentials. The back-end Application accesses after user successful login, so this login process is called authentication. The user holds the credential, which is the combination of the username and password.
The authorization means what user is allowed to do. It is the mechanism in the Application, which determines what level of access for resources by a particular action authenticates the user. Suppose an Application has a functionality to add and edit a user. The authorization mechanism determines who is allowed to add the user or who can edit a user.
The source code of this article is available at MSDN Sample
Implement ASP.NET Core Identity
First, create an empty ASP.NET Core project. As this project doesn’t hold default implementation of ASP.NET Core Identity, so we build an Application step by step with ASP.NET Core Identity. We don’t have the default implementation of ASP.NET Core Identity due to which project.json file doesn't have any identity NuGet packages. Now, open the project.json file and modify it to add the dependencies and the tools, as per the code snippet given below.
- {
- "dependencies": {
- "Microsoft.NETCore.App": {
- "version": "1.1.0",
- "type": "platform"
- },
- "Microsoft.AspNetCore.Razor.Tools": {
- "version": "1.0.0-preview2-final",
- "type": "build"
- },
- "Microsoft.EntityFrameworkCore.Tools": {
- "version": "1.0.0-preview2-final",
- "type": "build"
- },
- "BundlerMinifier.Core": "2.2.306",
- "Microsoft.AspNetCore.Mvc": "1.1.0",
- "Microsoft.AspNetCore.Server.IISIntegration": "1.1.0",
- "Microsoft.AspNetCore.Server.Kestrel": "1.1.0",
- "Microsoft.AspNetCore.StaticFiles": "1.1.0",
- "Microsoft.EntityFrameworkCore.SqlServer": "1.1.0",
- "Microsoft.EntityFrameworkCore.SqlServer.Design": "1.1.0",
- "Microsoft.Extensions.Configuration.EnvironmentVariables": "1.1.0",
- "Microsoft.Extensions.Configuration.Json": "1.1.0",
- "Microsoft.Extensions.Logging": "1.1.0",
- "Microsoft.Extensions.Logging.Console": "1.1.0",
- "Microsoft.Extensions.Logging.Debug": "1.1.0",
- "Microsoft.Extensions.Options.ConfigurationExtensions": "1.1.0",
- "Microsoft.VisualStudio.Web.BrowserLink.Loader": "14.1.0",
- "Microsoft.AspNetCore.Authentication.Cookies": "1.1.0",
- "Microsoft.AspNetCore.Diagnostics": "1.1.0",
- "Microsoft.AspNetCore.Diagnostics.EntityFrameworkCore": "1.1.0",
- "Microsoft.AspNetCore.Identity.EntityFrameworkCore": "1.1.0",
- "Microsoft.AspNetCore.Routing": "1.1.0"
- },
-
- "tools": {
- "Microsoft.AspNetCore.Razor.Tools": "1.0.0-preview2-final",
- "Microsoft.AspNetCore.Server.IISIntegration.Tools": "1.0.0-preview2-final",
- "Microsoft.EntityFrameworkCore.Tools": "1.0.0-preview2-final"
- },
-
- "frameworks": {
- "netcoreapp1.1": {
- "imports": [
- "dotnet5.6",
- "portable-net45+win8"
- ]
- }
- },
-
- "buildOptions": {
- "emitEntryPoint": true,
- "preserveCompilationContext": true
- },
-
- "runtimeOptions": {
- "configProperties": {
- "System.GC.Server": true
- }
- },
-
- "publishOptions": {
- "include": [
- "wwwroot",
- "**/*.cshtml",
- "appsettings.json",
- "web.config"
- ]
- },
-
- "scripts": {
- "prepublish": [ "bower install", "dotnet bundle" ],
- "postpublish": [ "dotnet publish-iis --publish-folder %publish:OutputPath% --framework %publish:FullTargetFramework%" ]
- }
- }
This file includes NuGet packages for both Entity Framework Core and ASP.NET Identity.
Now, create custom ApplicationUser class, which inherits IdentityUser class. This class holds the additional field for the identity user. The IdentityUser class holds user basic information such as Email, UserName, Password etc. The ApplicationUser class extends this class. It is used to store the user information. The code snippet is given below for the same.
- using Microsoft.AspNetCore.Identity.EntityFrameworkCore;
-
- namespace IdentitySampleApplication.Data
- {
- public class ApplicationUser:IdentityUser
- {
- public string Name { get; set; }
- }
- }
Now, create custom ApplicationRole class, which inherits IdenityRole class. This class holds the additional fields for the identity role.The IdentityRole class holds the role information such as RoleName. The ApplicationRole class extends this class. It is used to store the role information. The code snippet is given below for the same.
- using Microsoft.AspNetCore.Identity.EntityFrameworkCore;
- using System;
-
- namespace IdentitySampleApplication.Data
- {
- public class ApplicationRole:IdentityRole
- {
- public string Description { get; set; }
- public DateTime CreatedDate { get; set; }
- public string IPAddress { get; set; }
- }
- }
To perform the database operations, we create an IdentityDbContext class named ApplicationDbContext, as per the code snippet given below.
- using Microsoft.AspNetCore.Identity.EntityFrameworkCore;
- using Microsoft.EntityFrameworkCore;
-
- namespace IdentitySampleApplication.Data
- {
- public class ApplicationDbContext : IdentityDbContext<ApplicationUser, ApplicationRole, string>
- {
- public ApplicationDbContext(DbContextOptions<ApplicationDbContext> options) : base(options)
- {
-
- }
- }
- }
This class needs to know that which type Application user and role are dealing with the Application. We passed ApplicationUser and ApplicationRole as a parameter, while creating the object of ApplicationDbContext class. Here, the third parameter represents the primary key data type for both IdentityUser and IdentityRole.
The Application needs to configure to implement ASP.NET Core Identity. Now, add the identity in the method Configure of the Startup class. The code snippet is given below to add the identity in the Application.
As the concept of Dependency Injection is central to ASP.NET Core Application, we register context and identity to Dependency Injection during the Application start up. Thus, we register these as a Service in the ConfigureServices method of the StartUp class, as per the code snippet given below.
- public void ConfigureServices(IServiceCollection services)
- {
- services.AddDbContext<ApplicationDbContext>(options =>
- options.UseSqlServer(Configuration.GetConnectionString("DefaultConnection")));
-
- services.AddIdentity<ApplicationUser, ApplicationRole>()
- .AddEntityFrameworkStores<ApplicationDbContext>()
- .AddDefaultTokenProviders();
- services.AddMvc();
- }
Here, the DefaultConnection is the connection string, which is defined in appsettings.json file, as per the code snippet given below.
- {
- "ConnectionStrings": {
- "DefaultConnection": "Data Source=DESKTOP-RG33QHE;Initial Catalog=IdentitySampleDb;User ID=sa; Password=****"
- },
- "Logging": {
- "IncludeScopes": false,
- "LogLevel": {
- "Default": "Debug",
- "System": "Information",
- "Microsoft": "Information"
- }
- }
- }
Now, we have configured settings to create the database, so we have time to create a database, using migration. For database migration , we need to follow the following steps.
- Tools -> NuGet Package Manager -> Package Manager Console.
- Run PM> Add-Migration MyFirstMigration to scaffold a migration to create the initial set of tables for our model. If we receive an error , which states the term `add-migration' is not recognized as the name of a cmdlet, then close and reopen Visual Studio.
- Run PM> Update-Database to apply the new migration to the database. Since our database doesn't exist yet, it will be created for us before the migration is applied.
Application Roles
This section demonstrates that how to create, edit and delete the identity roles. There is a RoleManager, class which exposes the role related APIs. This creates a role in the Application and store in the database.
Now, we proceed to the controller. We create a controller named ApplicationRoleController under the Controllers folder of the Application. It has all ActionResult methods for the end user interface of the operations. We create RoleManager instance. Subsequently, we inject this in the controller's constructor to get its object. The following is a partial code snippet for the ApplicationRoleController in which RoleManager is injected, using constructor Dependency Injection.
- using IdentitySampleApplication.Data;
- using IdentitySampleApplication.Models;
- using Microsoft.AspNetCore.Http;
- using Microsoft.AspNetCore.Identity;
- using Microsoft.AspNetCore.Mvc;
- using System;
- using System.Collections.Generic;
- using System.Linq;
- using System.Threading.Tasks;
-
- namespace IdentitySampleApplication.Controllers
- {
- public class ApplicationRoleController : Controller
- {
- private readonly RoleManager<ApplicationRole> roleManager;
-
- public ApplicationRoleController(RoleManager<ApplicationRole> roleManager)
- {
- this.roleManager = roleManager;
- }
- }
- }
We can notice that Controller takes RoleManager as a constructor parameter. ASP.NET Core Dependency Injection will take care of passing an instance of RoleManager into ApplicationRoleController. The controller is developed to handle the operations requests for the Application identity role. Now, let's develop the user interface for the Role Listing, Add Role, Edit Role and Delete Role. Let's see each one by one.
Role List View
This is the first view when the Application is accessed or the entry point of the Application is executed. It shows the role listing, as shown in Figure 1. The role data is displayed in a tabular format and on this view, it has linked to adding a new role, edit a role and delete a role.
To pass the data from controller to view, create named ApplicationRoleListViewModel view model, as per the code snippet, mentioned below. This view model is used for role listing.
- namespace IdentitySampleApplication.Models
- {
- public class ApplicationRoleListViewModel
- {
- public string Id { get; set; }
- public string RoleName { get; set; }
- public string Description { get; set; }
- public int NumberOfUsers { get; set; }
- }
- }
Now, we create action method, which returns an index view with the data. The code snippet of an Index action method in ApplicationRoleController is mentioned below.
- [HttpGet]
- public IActionResult Index()
- {
- List<ApplicationRoleListViewModel> model = new List<ApplicationRoleListViewModel>();
- model = roleManager.Roles.Select(r => new ApplicationRoleListViewModel
- {
- RoleName = r.Name,
- Id = r.Id,
- Description = r.Description,
- NumberOfUsers = r.Users.Count
- }).ToList();
- return View(model);
- }
Now, we create an index view, as per the code snippet, mentioned below under the ApplicationRole folder of views.
- @model IEnumerable<ApplicationRoleListViewModel>
- @using IdentitySampleApplication.Models
- @using IdentitySampleApplication.Code
-
- <div class="top-buffer"></div>
- <div class="panel panel-primary">
- <div class="panel-heading panel-head">Application Roles</div>
- <div class="panel-body">
- <div class="btn-group">
- <a id="createRoleModal" data-toggle="modal" asp-action="AddEditApplicationRole" data-target="#modal-action-application-role" class="btn btn-primary">
- <i class="glyphicon glyphicon-plus"></i> Add Role
- </a>
- </div>
- <div class="top-buffer"></div>
- <table class="table table-bordered table-striped table-condensed">
- <thead>
- <tr>
- <th>Name</th>
- <th>Description</th>
- <th>Users</th>
- <th>Action</th>
- </tr>
- </thead>
- <tbody>
- @foreach (var item in Model)
- {
- <tr>
- <td>@item.RoleName</td>
- <td>@item.Description</td>
- <td>@item.NumberOfUsers</td>
- <td>
- <a id="addEditApplicationRoleModal" data-toggle="modal" asp-action="AddEditApplicationRole" asp-route-id="@item.Id" data-target="#modal-action-application-role"
- class="btn btn-info">
- <i class="glyphicon glyphicon-pencil"></i> Edit
- </a>
- @if (item.NumberOfUsers == 0)
- {
- <a id="deleteApplicationRoleModal" data-toggle="modal" asp-action="DeleteApplicationRole" asp-route-id="@item.Id" data-target="#modal-action-application-role" class="btn btn-danger">
- <i class="glyphicon glyphicon-trash"></i> Delete
- </a>
- }
- </td>
- </tr>
- }
- </tbody>
- </table>
- </div>
- </div>
-
- @Html.Partial("_Modal", new BootstrapModel { ID = "modal-action-application-role", AreaLabeledId = "modal-action-application-role-label", Size = ModalSize.Medium })
-
- @section scripts
- {
- <script src="~/js/application-role-index.js" asp-append-version="true"></script>
- }
It shows how to create and delete forms in the Bootstrap model popup, so create the Application-role - index.js file, as per the code snippet given below.
- (function ($) {
- function ApplicationRole() {
- var $this = this;
-
- function initilizeModel() {
- $("#modal-action-application-role").on('loaded.bs.modal', function (e) {
-
- }).on('hidden.bs.modal', function (e) {
- $(this).removeData('bs.modal');
- });
- }
- $this.init = function () {
- initilizeModel();
- }
- }
- $(function () {
- var self = new ApplicationRole();
- self.init();
- })
- }(jQuery))
When the Application runs and calls the index() action method from ApplicationRoleController with a HttpGet request, it gets all the roles listed in the UI, as shown in Figure 1.
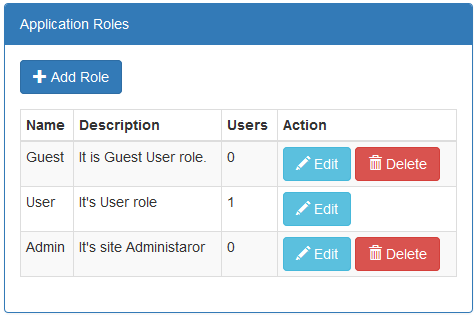
Figure 1: Application Role Listing
Add/Edit Application Role
To pass the data from UI to a controller to add and edit an Application role, use view model named ApplicationRoleViewModel. The code snippet is given below for the same.
- using System.ComponentModel.DataAnnotations;
-
- namespace IdentitySampleApplication.Models
- {
- public class ApplicationRoleViewModel
- {
- public string Id { get; set; }
- [Display(Name ="Role Name")]
- public string RoleName { get; set; }
- public string Description { get; set; }
- }
- }
The ApplicationRoleController has an action method named AddEditApplicationRole, which returns the view to add and edit an Application role. As we add and edit Application, the role is using same UI screen. The code snippet mentioned below is for same action method for both GET and Post requests.
- [HttpGet]
- public async Task<IActionResult> AddEditApplicationRole(string id)
- {
- ApplicationRoleViewModel model = new ApplicationRoleViewModel();
- if (!String.IsNullOrEmpty(id))
- {
- ApplicationRole applicationRole = await roleManager.FindByIdAsync(id);
- if (applicationRole != null)
- {
- model.Id = applicationRole.Id;
- model.RoleName = applicationRole.Name;
- model.Description = applicationRole.Description;
- }
- }
- return PartialView("_AddEditApplicationRole", model);
- }
- [HttpPost]
- public async Task<IActionResult> AddEditApplicationRole(string id, ApplicationRoleViewModel model)
- {
- if (ModelState.IsValid)
- {
- bool isExist = !String.IsNullOrEmpty(id);
- ApplicationRole applicationRole = isExist ? await roleManager.FindByIdAsync(id) :
- new ApplicationRole
- {
- CreatedDate = DateTime.UtcNow
- };
- applicationRole.Name = model.RoleName;
- applicationRole.Description = model.Description;
- applicationRole.IPAddress = Request.HttpContext.Connection.RemoteIpAddress.ToString();
- IdentityResult roleRuslt = isExist? await roleManager.UpdateAsync(applicationRole)
- : await roleManager.CreateAsync(applicationRole);
- if (roleRuslt.Succeeded)
- {
- return RedirectToAction("Index");
- }
- }
- return View(model);
- }
There are three asynchronous methods, which are used of the RoleManager class, which performs actions, as shown below.
- FindByIdAsync
This method has role Id as a parameter and returns already existing role, which is based on the input.
- CreateAsync
This method has new ApplicationRole as a parameter and creates new role in the Application.
- UpdateAsync
This method has an existing ApplicationRole as a parameter and updates that role in the Application.
The GET request for the AddEditApplicationRole action method returns _AddEditApplicationRole partial view; the code snippet follows under the ApplicationRole folder of views.
- @model ApplicationRoleViewModel
- @using IdentitySampleApplication.Models
-
- <form asp-action="AddEditApplicationRole" role="form">
- @await Html.PartialAsync("_ModalHeader", new ModalHeader { Heading =$"{(String.IsNullOrEmpty(Model.Id)? "Add" : "Edit")} Application Role" })
- <div class="modal-body form-horizontal">
- <div class="row">
- <div class="form-group">
- <label asp-for="RoleName" class="col-lg-3 col-sm-3 control-label"></label>
- <div class="col-lg-6">
- <input asp-for="RoleName" class="form-control" />
- </div>
- </div>
- <div class="form-group">
- <label asp-for="Description" class="col-lg-3 col-sm-3 control-label"></label>
- <div class="col-lg-6">
- <input asp-for="Description" class="form-control" />
- </div>
- </div>
- </div>
- </div>
- @await Html.PartialAsync("_ModalFooter", new ModalFooter { })
- </form>
When the Application runs and you click on the Add Role button or Edit button in the role listing, it makes a GET request for the AddEditApplicationRole() action; add/edit an Application role screen opens, as shown in Figure 2.
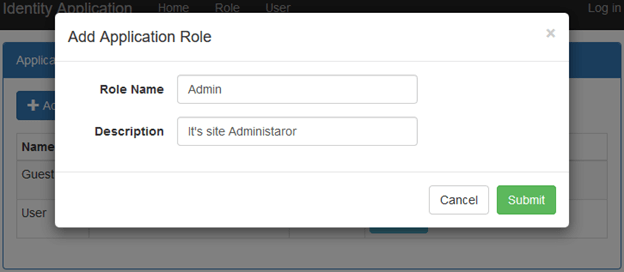 Figure 2: Add Application Role
Delete Application Role
The ApplicationRoleController has an action method named DeleteApplicationRole, which returns the view to delete an Application role named _DeleteApplicationRole. The code snippet mentioned below is for the same action method for both GET and Post requests.
- [HttpGet]
- public async Task<IActionResult> DeleteApplicationRole(string id)
- {
- string name = string.Empty;
- if (!String.IsNullOrEmpty(id))
- {
- ApplicationRole applicationRole = await roleManager.FindByIdAsync(id);
- if (applicationRole != null)
- {
- name = applicationRole.Name;
- }
- }
- return PartialView("_DeleteApplicationRole", name);
- }
-
- [HttpPost]
- public async Task<IActionResult> DeleteApplicationRole(string id, FormCollection form)
- {
- if(!String.IsNullOrEmpty(id))
- {
- ApplicationRole applicationRole = await roleManager.FindByIdAsync(id);
- if (applicationRole != null)
- {
- IdentityResult roleRuslt = roleManager.DeleteAsync(applicationRole).Result;
- if (roleRuslt.Succeeded)
- {
- return RedirectToAction("Index");
- }
- }
- }
- return View();
- }
Here DeleteAsync method of RoleManager is used, which has an existing Application role as an input parameter. It deletes an existing Application role.
The GET request for the DeleteApplicationRoler action method returns _DeleteUser partial View. The code snippet mentioned below is under the ApplicationRole folder of Views.
- @model string
- @using IdentitySampleApplication.Models
-
- <form asp-action="DeleteApplicationRole" role="form">
- @Html.Partial("_ModalHeader", new ModalHeader { Heading = "Delete Application Role" })
-
- <div class="modal-body form-horizontal">
- Are you want to delete @Model?
- </div>
- @Html.Partial("_ModalFooter", new ModalFooter { SubmitButtonText = "Delete" })
- </form>
When the Application runs and a user clicks on the "Delete" button in the Application role listing, it makes a GET request for the DeleteUser() action, then the delete Application role screen is shown below.
![]() Figure 3: Delete Application Role
Figure 3: Delete Application RoleApplication Users
This section demonstrates that how to create, edit and delete the identity users and how to assign the role to a user. There is a RoleManager class, which exposes the role related APIs and another is UserManager, which exposes the user related APIs. This creates the user in the Application and is stored in the database.
Now, we proceed to the controller. We create controller named UserController under the Controllers folder of the Application. It has all ActionResult methods for the end user interface of operations. We create both UserManager and RoleManager instances. Subsequently, we inject these in the controller's constructor to get its object. The following is a partial code snippet for the UserController in which UserManager and RoleManager are injected, using constructor Dependency Injection.
- using IdentitySampleApplication.Data;
- using IdentitySampleApplication.Models;
- using Microsoft.AspNetCore.Http;
- using Microsoft.AspNetCore.Identity;
- using Microsoft.AspNetCore.Mvc;
- using Microsoft.AspNetCore.Mvc.Rendering;
- using System;
- using System.Collections.Generic;
- using System.Linq;
- using System.Threading.Tasks;
-
- namespace IdentitySampleApplication.Controllers
- {
- public class UserController : Controller
- {
- private readonly UserManager<ApplicationUser> userManager;
- private readonly RoleManager<ApplicationRole> roleManager;
-
- public UserController(UserManager<ApplicationUser> userManager, RoleManager<ApplicationRole> roleManager)
- {
- this.userManager = userManager;
- this.roleManager = roleManager;
- }
- }
- }
We can notice that Controller takes UserManager and RoleManager as constructor parameters. ASP.NET Core Dependency Injection will take care of passing the instances of both UserManager and RoleManager into UserController. The controller is developed to handle the operations requests for the Application identity user. Now, let's develop the user interface for the user listing, add user, edit user and delete user. Let's see each one by one.
User List View
When we click on top User menu of the Application, it shows the role listing, as shown in Figure 4. The user data is displayed in a tabular format and on this view, it has linked to adding a new user, edit a user and delete a user.
To pass the data from the controller to view, create named UserListViewModel view model, as per the code snippet, mentioned below. This view model is used for the user listing.
- namespace IdentitySampleApplication.Models
- {
- public class UserListViewModel
- {
- public string Id { get; set; }
- public string Name { get; set; }
- public string Email { get; set; }
- public string RoleName { get; set; }
- }
- }
Now, we create an action method, which returns an index view with the data. The code snippet of an Index action method in UserController is mentioned below.
- [HttpGet]
- public IActionResult Index()
- {
- List<UserListViewModel> model = new List<UserListViewModel>();
- model = userManager.Users.Select(u => new UserListViewModel
- {
- Id = u.Id,
- Name = u.Name,
- Email = u.Email
- }).ToList();
- return View(model);
- }
Now, we create an index view, as per the code snippet, mentioned below under the User folder of the views.
- @model IEnumerable<UserListViewModel>
- @using IdentitySampleApplication.Models
- @using IdentitySampleApplication.Code
-
- <div class="top-buffer"></div>
- <div class="panel panel-primary">
- <div class="panel-heading panel-head">Users</div>
- <div class="panel-body">
- <div class="btn-group">
- <a id="createEditUserModal" data-toggle="modal" asp-action="AddUser" data-target="#modal-action-user" class="btn btn-primary">
- <i class="glyphicon glyphicon-plus"></i> Add User
- </a>
- </div>
- <div class="top-buffer"></div>
- <table class="table table-bordered table-striped table-condensed">
- <thead>
- <tr>
- <th>Name</th>
- <th>Email</th>
- <th>Action</th>
- </tr>
- </thead>
- <tbody>
- @foreach (var item in Model)
- {
- <tr>
- <td>@item.Name</td>
- <td>@item.Email</td>
- <td>
- <a id="editUserModal" data-toggle="modal" asp-action="EditUser" asp-route-id="@item.Id" data-target="#modal-action-user"
- class="btn btn-info">
- <i class="glyphicon glyphicon-pencil"></i> Edit
- </a>
- <a id="deleteUserModal" data-toggle="modal" asp-action="DeleteUser" asp-route-id="@item.Id" data-target="#modal-action-user" class="btn btn-danger">
- <i class="glyphicon glyphicon-trash"></i> Delete
- </a>
- </td>
- </tr>
- }
- </tbody>
- </table>
- </div>
- </div>
-
- @Html.Partial("_Modal", new BootstrapModel { ID = "modal-action-user", AreaLabeledId = "modal-action-user-label", Size = ModalSize.Medium })
-
- @section scripts
- {
- <script src="~/js/user-index.js" asp-append-version="true"></script>
- }
It shows all the operational forms in the Bootstrap model popup, so create the user - index.js file, as per the code snippet given below.
- (function ($) {
- function User() {
- var $this = this;
-
- function initilizeModel() {
- $("#modal-action-user").on('loaded.bs.modal', function (e) {
-
- }).on('hidden.bs.modal', function (e) {
- $(this).removeData('bs.modal');
- });
- }
- $this.init = function () {
- initilizeModel();
- }
- }
- $(function () {
- var self = new User();
- self.init();
- })
- }(jQuery))
When the Application runs and calls the index() action method from UserController with a HttpGet request, it gets all the users, which are listed in the UI, as shown in Figure 4.
![]() Figure 4: User Listing
Figure 4: User ListingAdd User
To pass the data from UI to a controller to add a user, it uses view model named UserViewModel. The code snippet is given below for the same.
- using Microsoft.AspNetCore.Mvc.Rendering;
- using System.Collections.Generic;
- using System.ComponentModel.DataAnnotations;
-
- namespace IdentitySampleApplication.Models
- {
- public class UserViewModel
- {
- public string Id { get; set; }
- public string UserName { get; set; }
- [DataType(DataType.Password)]
- public string Password { get; set; }
- [Display(Name="Confirm Password")]
- [DataType(DataType.Password)]
- public string ConfirmPassword { get; set; }
- public string Name { get; set; }
- public string Email { get; set; }
- public List<SelectListItem> ApplicationRoles { get; set; }
- [Display(Name = "Role")]
- public string ApplicationRoleId { get; set; }
- }
- }
The UserController has an action method, which is named as AddUser, which returns the view to add a user. The code snippet mentioned below is for same action method for both GET and Post requests.
- [HttpGet]
- public IActionResult AddUser()
- {
- UserViewModel model = new UserViewModel();
- model.ApplicationRoles = roleManager.Roles.Select(r => new SelectListItem
- {
- Text = r.Name,
- Value = r.Id
- }).ToList();
- return PartialView("_AddUser", model);
- }
-
- [HttpPost]
- public async Task<IActionResult> AddUser(UserViewModel model)
- {
- if (ModelState.IsValid)
- {
- ApplicationUser user = new ApplicationUser
- {
- Name = model.Name,
- UserName = model.UserName,
- Email = model.Email
- };
- IdentityResult result = await userManager.CreateAsync(user, model.Password);
- if (result.Succeeded)
- {
- ApplicationRole applicationRole = await roleManager.FindByIdAsync(model.ApplicationRoleId);
- if (applicationRole != null)
- {
- IdentityResult roleResult = await userManager.AddToRoleAsync(user, applicationRole.Name);
- if (roleResult.Succeeded)
- {
- return RedirectToAction("Index");
- }
- }
- }
- }
- return View(model);
- }
There are two asynchronous methods, which are used of the UserManager class, which performs an action, as shown below.
- CreateAsync
This method has new ApplicationUser as a parameter and creates new user in the Application.
- AddToRoleAsync
This method has two parameters, where one is an existing Application user and another is the role name. It assigns a role to the Application user.
The GET request for the AddUser action method returns _AddUser partial view; the code snippet follows under the User folder of views.
- @model UserViewModel
- @using IdentitySampleApplication.Models
-
- <form asp-action="AddUser" role="form">
- @await Html.PartialAsync("_ModalHeader", new ModalHeader { Heading = "Add User" })
- <div class="modal-body form-horizontal">
- <div class="row">
- <div class="col-lg-6">
- <div class="form-group">
- <label asp-for="Name" class="col-lg-3 col-sm-3 control-label"></label>
- <div class="col-lg-6">
- <input asp-for="Name" class="form-control" />
- </div>
- </div>
- <div class="form-group">
- <label asp-for="Email" class="col-lg-3 col-sm-3 control-label"></label>
- <div class="col-lg-6">
- <input asp-for="Email" class="form-control" />
- </div>
- </div>
- <div class="form-group">
- <label asp-for="ApplicationRoleId" class="col-lg-3 col-sm-3 control-label"></label>
- <div class="col-lg-6">
- <select asp-for="ApplicationRoleId" asp-items="@Model.ApplicationRoles" class="form-control">
- <option>Please select</option>
- </select>
- </div>
- </div>
- </div>
- <div class="col-lg-6">
- <div class="form-group">
- <label asp-for="UserName" class="col-lg-3 col-sm-3 control-label"></label>
- <div class="col-lg-6">
- <input asp-for="UserName" class="form-control" />
- </div>
- </div>
- <div class="form-group">
- <label asp-for="Password" class="col-lg-3 col-sm-3 control-label"></label>
- <div class="col-lg-6">
- <input asp-for="Password" class="form-control" />
- </div>
- </div>
- <div class="form-group">
- <label asp-for="ConfirmPassword" class="col-lg-3 col-sm-3 control-label"></label>
- <div class="col-lg-6">
- <input asp-for="ConfirmPassword" class="form-control" />
- </div>
- </div>
- </div>
- </div>
- </div>
- @await Html.PartialAsync("_ModalFooter", new ModalFooter { })
- </form>
When the Application runs and we click on the Add User button, it makes a GET request for the AddUser() action; add a user screen, as shown in Figure 5.
 Figure 5: Add User
Edit User
To pass the data from UI to the controller to edit a user, use view model named EditUserViewModel.
- using Microsoft.AspNetCore.Mvc.Rendering;
- using System.Collections.Generic;
- using System.ComponentModel.DataAnnotations;
-
- namespace IdentitySampleApplication.Models
- {
- public class EditUserViewModel
- {
- public string Id { get; set; }
- public string Name { get; set; }
- public string Email { get; set; }
- public List<SelectListItem> ApplicationRoles { get; set; }
- [Display(Name = "Role")]
- public string ApplicationRoleId { get; set; }
- }
- }
The UserController has an action method named EditUser, which returns the view to edit a user. The code snippet mentioned below is for the same action method for both GET and Post requests.
- [HttpGet]
- public async Task<IActionResult> EditUser(string id)
- {
- EditUserViewModel model = new EditUserViewModel();
- model.ApplicationRoles = roleManager.Roles.Select(r => new SelectListItem
- {
- Text = r.Name,
- Value = r.Id
- }).ToList();
-
- if (!String.IsNullOrEmpty(id))
- {
- ApplicationUser user = await userManager.FindByIdAsync(id);
- if (user != null)
- {
- model.Name = user.Name;
- model.Email = user.Email;
- model.ApplicationRoleId = roleManager.Roles.Single(r => r.Name == userManager.GetRolesAsync(user).Result.Single()).Id;
- }
- }
- return PartialView("_EditUser", model);
- }
-
- [HttpPost]
- public async Task<IActionResult> EditUser(string id, EditUserViewModel model)
- {
- if (ModelState.IsValid)
- {
- ApplicationUser user = await userManager.FindByIdAsync(id);
- if (user != null)
- {
- user.Name = model.Name;
- user.Email = model.Email;
- string existingRole = userManager.GetRolesAsync(user).Result.Single();
- string existingRoleId = roleManager.Roles.Single(r => r.Name == existingRole).Id;
- IdentityResult result = await userManager.UpdateAsync(user);
- if (result.Succeeded)
- {
- if (existingRoleId != model.ApplicationRoleId)
- {
- IdentityResult roleResult = await userManager.RemoveFromRoleAsync(user, existingRole);
- if (roleResult.Succeeded)
- {
- ApplicationRole applicationRole = await roleManager.FindByIdAsync(model.ApplicationRoleId);
- if (applicationRole != null)
- {
- IdentityResult newRoleResult = await userManager.AddToRoleAsync(user, applicationRole.Name);
- if (newRoleResult.Succeeded)
- {
- return RedirectToAction("Index");
- }
- }
- }
- }
- }
- }
- }
- return PartialView("_EditUser", model);
- }
There are four asynchronous methods, which are used of the UserManager class, which performs an action, as shown below.
- FindByIdAsync
This method has an Application user Id as a parameter and returns already existing user, which is based on the input.
- GetRolesAsync
This method takes an existing Application user as a parameter and returns the existing roles, which assigned to that particular user.
- UpdateAsync
This method has an existing ApplicationUser as a parameter and updates that user in the Application.
- RemoveFromRoleAsync
This method has two parameters, where one is an existing Application user and another is assigned the role name. It removes the assigned role from that Application user.
The GET request for the EditUser action method returns _EditUser partial view; the code snippet follows under the User folder of views.
- @model EditUserViewModel
- @using IdentitySampleApplication.Models
-
- <form asp-action="EditUser" role="form">
- @await Html.PartialAsync("_ModalHeader", new ModalHeader { Heading = "Edit User" })
- <div class="modal-body form-horizontal">
- <div class="row">
- <div class="form-group">
- <label asp-for="Name" class="col-lg-3 col-sm-3 control-label"></label>
- <div class="col-lg-6">
- <input asp-for="Name" class="form-control" />
- </div>
- </div>
- <div class="form-group">
- <label asp-for="Email" class="col-lg-3 col-sm-3 control-label"></label>
- <div class="col-lg-6">
- <input asp-for="Email" class="form-control" />
- </div>
- </div>
-
- <div class="form-group">
- <label asp-for="ApplicationRoleId" class="col-lg-3 col-sm-3 control-label"></label>
- <div class="col-lg-6">
- <select asp-for="ApplicationRoleId" asp-items="@Model.ApplicationRoles" class="form-control">
- <option>Please select</option>
- </select>
- </div>
- </div>
- </div>
- </div>
- @await Html.PartialAsync("_ModalFooter", new ModalFooter { })
- </form>
When the Application runs and you click on the Edit button in the User listing, it makes a GET request for the EditUser() action, followed by editing the user screen, which is shown in Figure 6.
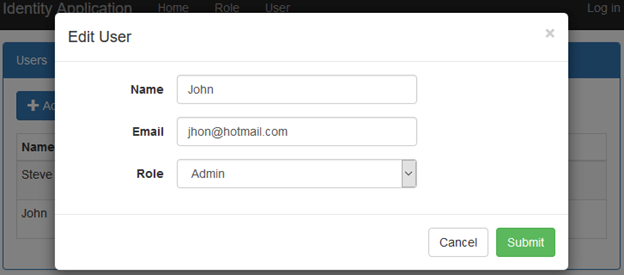 Figure 6: Edit User
Delete User
The UserController has an action method named DeleteUser, which returns the view to delete a user. The code snippet mentioned below is for the same action method for both GET and Post requests.
- [HttpGet]
- public async Task<IActionResult> DeleteUser(string id)
- {
- string name = string.Empty;
- if (!String.IsNullOrEmpty(id))
- {
- ApplicationUser applicationUser = await userManager.FindByIdAsync(id);
- if (applicationUser != null)
- {
- name = applicationUser.Name;
- }
- }
- return PartialView("_DeleteUser", name);
- }
-
- [HttpPost]
- public async Task<IActionResult> DeleteUser(string id, FormCollection form)
- {
- if (!String.IsNullOrEmpty(id))
- {
- ApplicationUser applicationUser = await userManager.FindByIdAsync(id);
- if (applicationUser != null)
- {
- IdentityResult result = await userManager.DeleteAsync(applicationUser);
- if (result.Succeeded)
- {
- return RedirectToAction("Index");
- }
- }
- }
- return View();
- }
Here, DeleteAsync method of UserManager is used, which takes an existing Application user as an input parameter. It deletes an existing Application user.
The GET request for the DeleteUser action method returns _DeleteUser partial View. The code snippet mentioned below is under the User folder of Views.
- @model string
- @using IdentitySampleApplication.Models
-
- <form asp-action="DeleteUser" role="form">
- @Html.Partial("_ModalHeader", new ModalHeader { Heading = "Delete User" })
-
- <div class="modal-body form-horizontal">
- Are you want to delete @Model?
- </div>
- @Html.Partial("_ModalFooter", new ModalFooter { SubmitButtonText = "Delete" })
- </form>
When the Application runs and a user clicks on the "Delete" button in the user listing, it makes a GET request for the DeleteUser() action, then the delete user screen is shown below.
 Figure 7: Delete User
Authentication and Authorisation
This section demonstrates the login and logout functionality of the Application. As the Application users are already existing in the system with a role, to implement login and logout functionality, create AccountController under the Controllers folder. This controller holds both login and logout action methods. We create SignInManager instance. Now, we inject it in the controller's constructor to get its object. The following is a partial code snippet for the AccountController in which SignInManager is injected, using constructor Dependency Injection.
- using IdentitySampleApplication.Data;
- using IdentitySampleApplication.Models;
- using Microsoft.AspNetCore.Authorization;
- using Microsoft.AspNetCore.Identity;
- using Microsoft.AspNetCore.Mvc;
- using System.Threading.Tasks;
-
-
- namespace IdentitySampleApplication.Controllers
- {
- public class AccountController : Controller
- {
- private readonly SignInManager<ApplicationUser> signInManager;
-
- public AccountController(SignInManager<ApplicationUser> signInManager)
- {
- this.signInManager = signInManager;
- }
- }
- }
Role-Based Authorisation
The Application has a HomeController, which is accessed after successful authentication. It holds an action method named Index, which returns a view by authenticating the username.
- using IdentitySampleApplication.Data;
- using Microsoft.AspNetCore.Authorization;
- using Microsoft.AspNetCore.Identity;
- using Microsoft.AspNetCore.Mvc;
-
- namespace IdentitySampleApplication.Controllers
- {
- [Authorize]
- public class HomeController : Controller
- {
- private readonly UserManager<ApplicationUser> userManager;
-
- public HomeController(UserManager<ApplicationUser> userManager)
- {
- this.userManager = userManager;
- }
- [Authorize(Roles = "User")]
- public IActionResult Index()
- {
- string userName = userManager.GetUserName(User);
- return View("Index",userName);
- }
- }
- }
Here, Authorize attribute is used on the controller level, which means that this controller is accessed by only authenticate users. The action method has also used Authorize attribute with roles, which represents that what role can access this action method. The code snippet given above represents that if an authenticate user has the “User” role then he is authorized to access this action. This is role based authorization.
The GetUserName method of UserManager returns the authenticate user’s username, which is based on the user.
The authorized GET request for the Index action method returns an Index view. The code snippet follows under the Home folder of views.
- @model string
- <h1> Welocome @Model</h1>
The Application has a partial view, which is used to show following details on the top header. If the user is not authenticated, it shows Log In button on top. If the user is authenticated, it shows the username and Log Off button.
- @using Microsoft.AspNetCore.Identity
- @using IdentitySampleApplication.Models
- @using IdentitySampleApplication.Data
-
- @inject SignInManager<ApplicationUser> SignInManager
- @inject UserManager<ApplicationUser> UserManager
-
- @if (SignInManager.IsSignedIn(User))
- {
- <form asp-area="" asp-controller="Account" asp-action="SignOff" method="post" id="logoutForm" class="navbar-right">
- <ul class="nav navbar-nav navbar-right">
- <li>
- <a asp-area="" asp-controller="Manage" asp-action="Index" title="Manage">Hello @UserManager.GetUserName(User)!</a>
- </li>
- <li>
- <button type="submit" class="btn btn-link navbar-btn navbar-link">Log off</button>
- </li>
- </ul>
- </form>
- }
- else
- {
- <ul class="nav navbar-nav navbar-right">
- <li><a asp-area="" asp-controller="Account" asp-action="Login">Log in</a></li>
- </ul>
- }
As per the code snippet given above, the view has Injected Dependecy on its level and created instances of both SignInManager and UserManager. The IsSignedIn method of SignInManager class checks wheather a user login or not in the application.
Login
To pass the data from UI to a controller to login an Application user, it uses view model named LoginViewModel. The code snippet is given below for the same.
- using System.ComponentModel.DataAnnotations;
-
- namespace IdentitySampleApplication.Models
- {
- public class LoginViewModel
- {
- [Required]
- public string UserName { get; set; }
- [Required]
- [DataType(DataType.Password)]
- public string Password { get; set; }
- [Display(Name = "Remember me?")]
- public bool RememberMe { get; set; }
- }
- }
The AccountController has two action methods, where one is for GET request named Login, which returns the view to login and another has same name. It also handles POST request to login an Application user. The code snippet mentioned below is for same action method for both GET and Post requests.
- [HttpGet]
- public IActionResult Login(string returnUrl = null)
- {
- ViewData["ReturnUrl"] = returnUrl;
- return View();
- }
-
- [HttpPost]
- [AllowAnonymous]
- [ValidateAntiForgeryToken]
- public async Task<IActionResult> Login(LoginViewModel model, string returnUrl = null)
- {
- ViewData["ReturnUrl"] = returnUrl;
- if (ModelState.IsValid)
- {
- var result = await signInManager.PasswordSignInAsync(model.UserName, model.Password, model.RememberMe, lockoutOnFailure: false);
- if (result.Succeeded)
- {
- return RedirectToLocal(returnUrl);
- }
- else
- {
- ModelState.AddModelError(string.Empty, "Invalid login attempt.");
- return View(model);
- }
- }
- return View(model);
- }
- private IActionResult RedirectToLocal(string returnUrl)
- {
- if (Url.IsLocalUrl(returnUrl))
- {
- return Redirect(returnUrl);
- }
- else
- {
- return RedirectToAction(nameof(HomeController.Index), "Home");
- }
- }
Here the Login action method has a parameter named returnUrl, which represents that a user is redirected on a page after login. Suppose an end user is not authenticated and he tries to access the internal page via URL, then this internal page URL is stored in this parameter and the user is redirected on the login screen. Afterwards, the user authenticates from the login screen, followed by redirecting on that URL page rather than a regular redirection.
The SignInManager class exposes API methods, which is used to manage sign in operations. There is a asynchronous method, which is PasswordSignInAsync. This method takes the username and password of a user as inputs and checks its validity and issues the Application cookie, if they are correct.
The GET request for the Login action method returns Login view and the code snippet follows under the Account folder of views.
- @model LoginViewModel
- @using IdentitySampleApplication.Models
-
- <div class="row">
- <div class="col-md-3"></div>
- <div class="col-md-6">
- <div class="top-buffer"></div>
- <div class="panel panel-primary">
- <div class="panel-heading">Login</div>
- <div class="panel-body">
- <section>
- <form asp-controller="Account" asp-action="Login" asp-route-returnurl="@ViewData["ReturnUrl"]" method="post" class="form-horizontal">
- <h4>Use a local account to log in.</h4>
- <hr />
- <div asp-validation-summary="All" class="text-danger"></div>
- <div class="form-group">
- <label asp-for="UserName" class="col-md-2 control-label"></label>
- <div class="col-md-10">
- <input asp-for="UserName" class="form-control" />
- <span asp-validation-for="UserName" class="text-danger"></span>
- </div>
- </div>
- <div class="form-group">
- <label asp-for="Password" class="col-md-2 control-label"></label>
- <div class="col-md-10">
- <input asp-for="Password" class="form-control" />
- <span asp-validation-for="Password" class="text-danger"></span>
- </div>
- </div>
- <div class="form-group">
- <div class="col-md-offset-2 col-md-10">
- <div class="checkbox">
- <label asp-for="RememberMe">
- <input asp-for="RememberMe" />
- @Html.DisplayNameFor(m => m.RememberMe)
- </label>
- </div>
- </div>
- </div>
- <div class="form-group">
- <div class="col-md-offset-2 col-md-10">
- <button type="submit" class="btn btn-primary">Log in</button>
- </div>
- </div>
- </form>
- </section>
- </div>
- </div>
- </div>
- <div class="col-md-3"></div>
- </div>
When the Application runs and you click on the LogIn button, it makes a GET request for the Login() action and show the login screen, as shown in Figure 8.
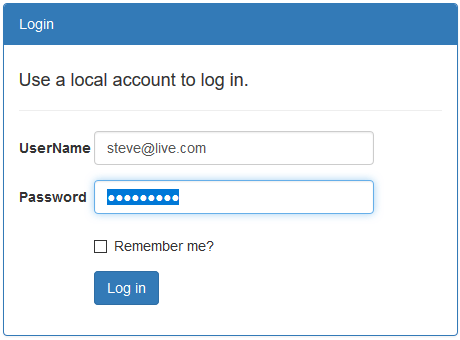 Figure 8: Login Screen
Now, we login with the valid credentials of a user, which has “User” role as well, followed by redirecting on the Index action method of HomeController. The Index view shows is shown in Figure 9.
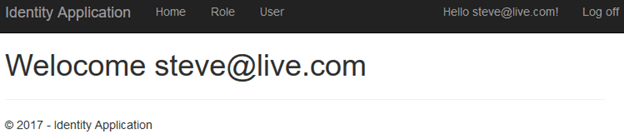 Figure 9: Home screen
Now, we login with valid credentials of a user while that user doesn’t have “User” role as well then it redirects on the AccessDenied action method of AccountController.
- public IActionResult AccessDenied()
- {
- return View();
- }
The AccessDenied action method returns AccessDenied view, which has the code snippet given below.
- <div class="row">
- <div class="col-md-3"></div>
- <div class="col-md-6">
- <div class="top-buffer"></div>
- <div class="panel panel-danger">
- <div class="panel-heading">Access Denied</div>
- <div class="panel-body">
- <section>
- <h1 class="text-danger">401 ! Access Denied</h1>
- <br />
- <a href="javascript:void(0)" onClick="backAway()" class="btn btn-success">Back</a>
- </section>
- </div>
- </div>
- </div>
- <div class="col-md-3"></div>
- </div>
-
- @section scripts
- {
- <script>
- function backAway() {
- if (history.length === 1) {
- window.location = "http://localhost:50841/"
- } else {
- history.back();
- }
- }
- </script>
- }
Now, run the Application and login with the valid credentials. Its authentication is successful. This authenticates the user, who doesn’t have ‘User’ roles due to which it’s not authorized to access Index method of HomeController and is being redirected on access denied. The screen given below shows in case of access denied.
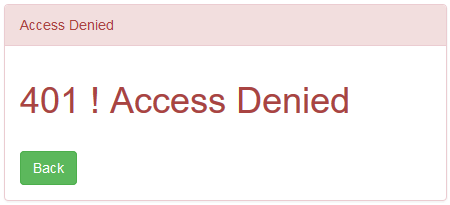 Figure 10: Access Denied
Now, create an action method for Logout in AccountController, as per the code snippet given below.
- [HttpPost]
- [ValidateAntiForgeryToken]
- public async Task<IActionResult> SignOff()
- {
- await signInManager.SignOutAsync();
- return RedirectToAction("Login");
- }
This SignOutAsync clears the user claims, which are stored in cookies. This action method calls, when we click on Logout button, which is placed at the top.


