Tailwind Traders has chosen Azure SQL Database for part of its migration. You've been tasked with creating the database.
In this exercise, you'll create a SQL database in Azure and then query the data in that database.
Task 1: Create the database
In this task, you'll create a SQL database based on the AdventureWorksLT sample database.
Sign in to the Azure portal.
Select Create a resource > Databases > SQL database. The Create SQL Database pane appears.
Enter the following values for each setting.
Setting Value Project details Subscription Concierge Subscription Resource group [Sandbox resource group] Database details Database name db1 Server Select Create new The Create SQL Database Server pane appears.
Enter the following values for each setting.
Setting Value Server details Server name sqlservernnnn (replace nnnn with letters and digits for a globally unique name) Location (US) East US Authentication Authentication method Use SQL Authentication Server admin login sqluser Password Pa$$w0rd1234 Select OK.
Complete the remaining fields for Create SQL Database using the following values.
Setting Value Want to use SQL elastic pool? No (default) Compute + storage General Purpose (default) Backup storage redundancy Backup storage redundancy Geo-redundant backup storage 
Select Next : Networking, and configure the following settings (accept defaults for fields not specified).
Setting Value Network connectivity Connectivity method Public endpoint 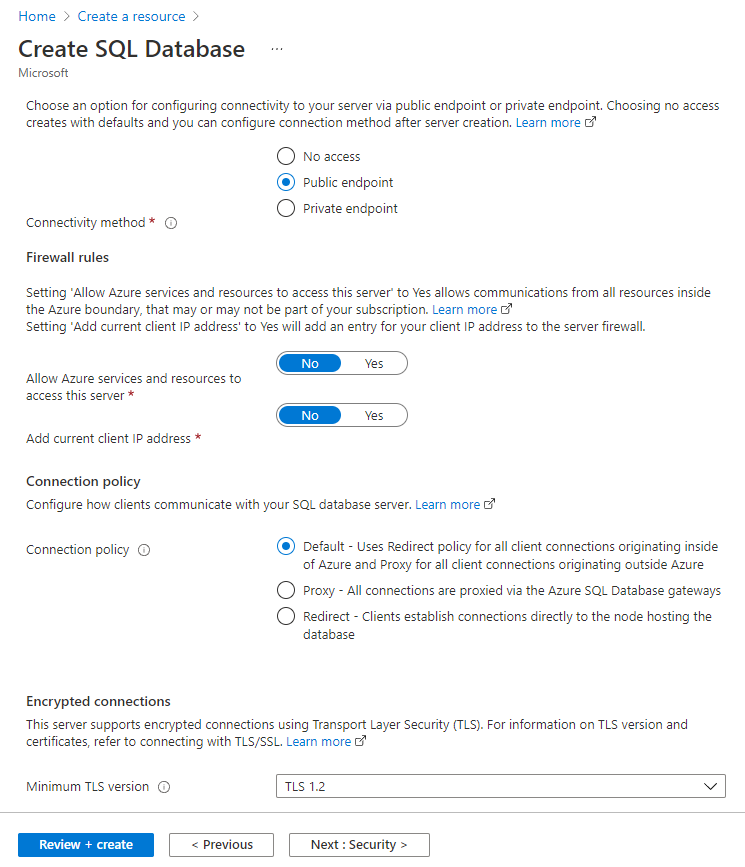
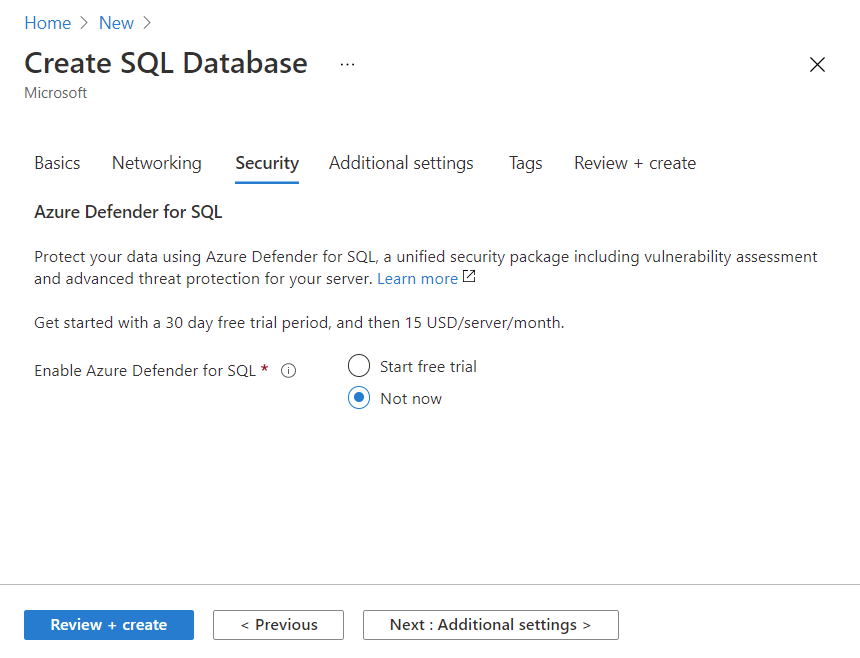
Select Next : Security, and for Enable Azure Defender for SQL, choose Not now. Leave the remaining settings as default (not configured).
Select Next : Additional settings, and configure the following settings.
Setting Value Data source Use existing data Sample Database collation Collation SQL_Latin1_General_CP1_CI_AS (default) 
Select Review + create to validate configuration entries.
Select Create to deploy the server and database. It can take approximately two to five minutes to create the server and deploy the sample database. The deployment pane shows the status, with updates for each resource that is created.
When deployment is complete, select Go to resource. The db1 SQL database Overview pane shows the essentials of the newly deployed database
In the command bar, select Set server firewall. The Firewall settings page appears.
Check the box next to Allow Azure services and resources to access this server at the bottom of the page, leaving other settings as default.
Select Save to update firewall settings, then close the Firewall settings pane.

Task 2: Test the database
In this task, you'll configure the server and run a SQL query.
In Azure resources menu, select All resources. Search for and select the SQL database resource Type, and ensure that your new database was created. You might need to refresh the page.
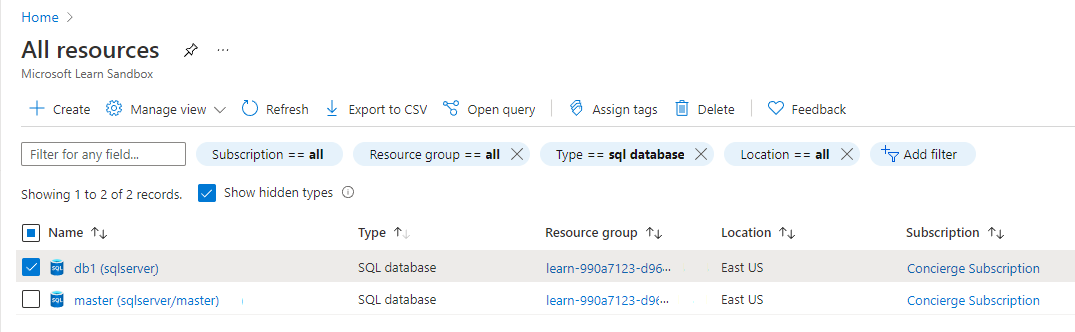
Select db1, the SQL database you created.
In the SQL database menu, select Query editor (preview). The Query editor (preview) pane appears.
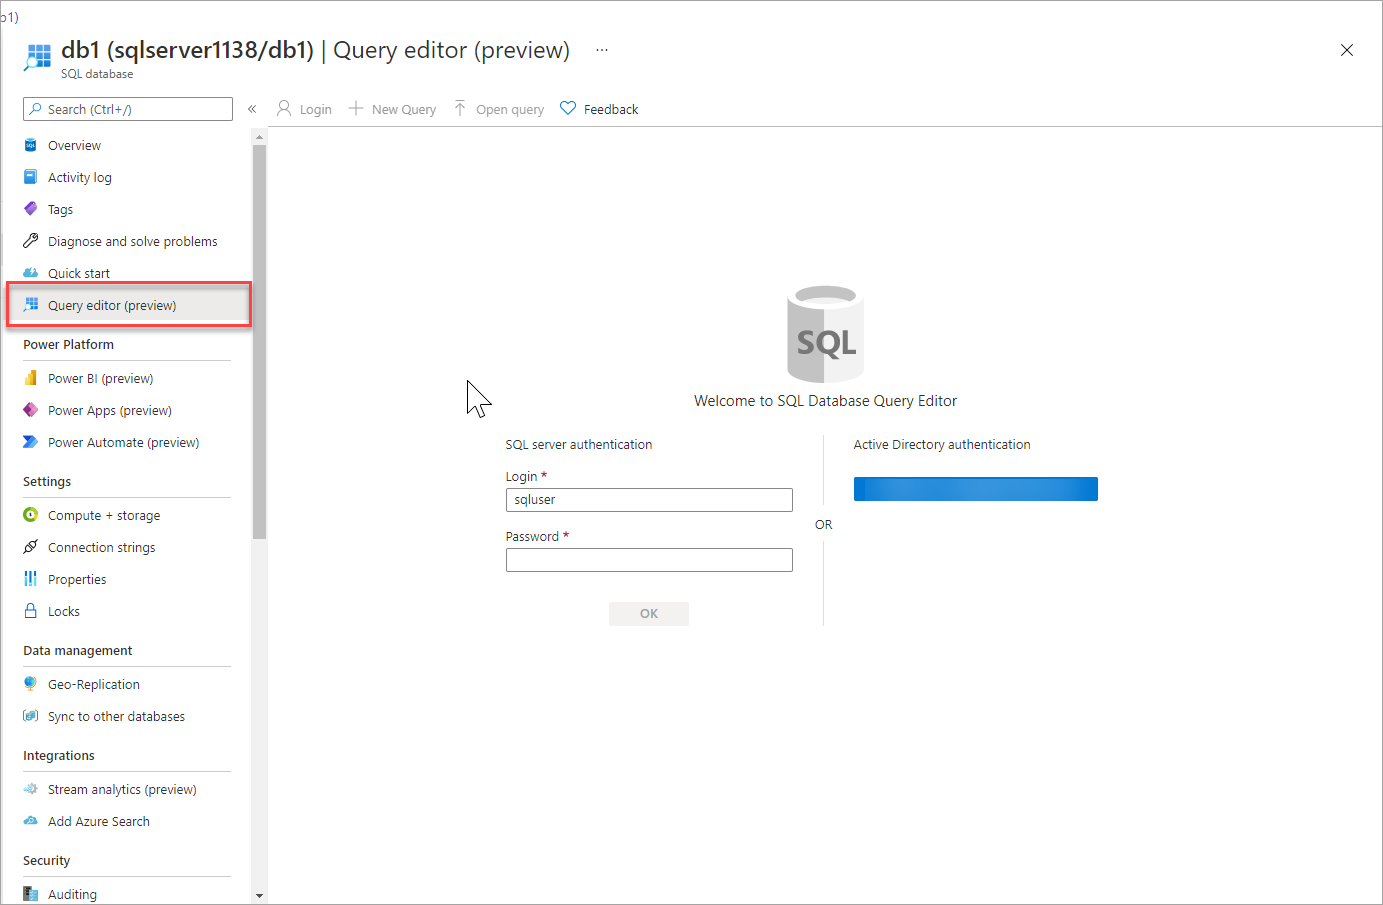
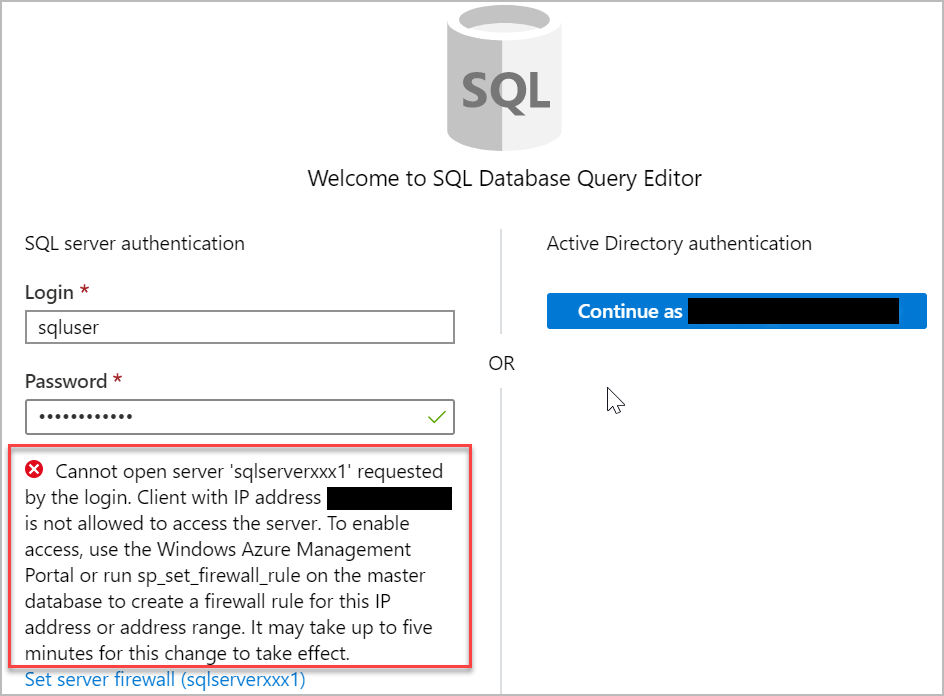
Sign in as sqluser, with the password Pa$$w0rd1234.
You will not be able to sign in because your IP address needs to be enabled in a firewall rule.
In the Query editor menu, select Overview (your edits will be lost), and in the command bar, select Set server firewall. The Firewall settings page appears.
In the Client IP address section, your IP will be shown (verify that it is the same client IP address from the error you received in the previous step).
In the command bar select Add your client IPv4 address. This will add a Rule name that contains your IP address in both the Start IP and End IP fields.
Select Save to save this firewall rule.

Select your db1 database in the breadcrumb at the top of the page to return to your SQL database, and then select Query editor (preview) from the menu.
Sign in again as sqluser, with the password Pa$$w0rd1234. This time you should succeed. It might take a couple of minutes for the new firewall rule to be deployed. If you still get an error, verify the client IP address in the error, and return to Firewall settings to add the correct client IP address.
After you sign in successfully, the query pane appears. Enter the following SQL query into the editor pane.
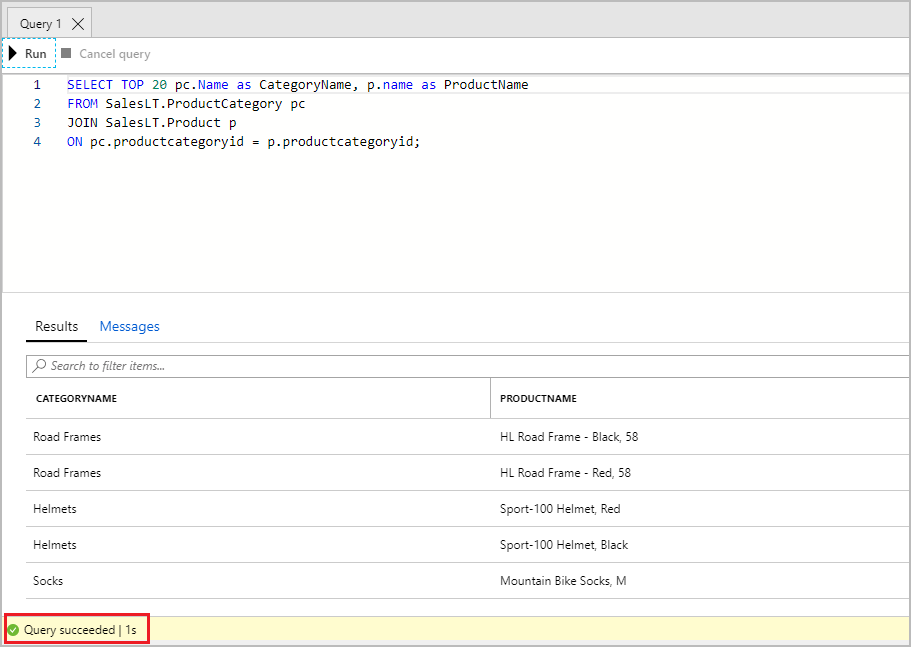
SQLSELECT TOP 20 pc.Name as CategoryName, p.name as ProductName FROM SalesLT.ProductCategory pc JOIN SalesLT.Product p ON pc.productcategoryid = p.productcategoryid;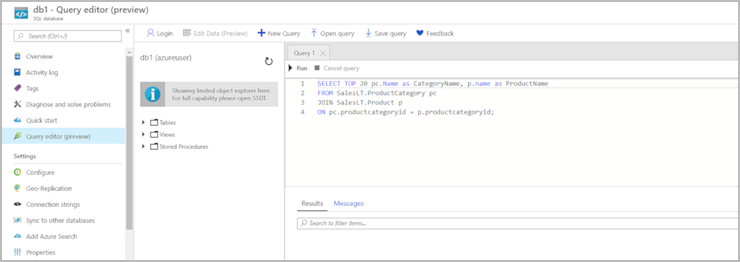
Select Run, and then review the query results in the Results pane. The query should run successfully.

Congratulations! You've created a SQL database in Azure and successfully queried the data in that database.
No comments:
Post a Comment