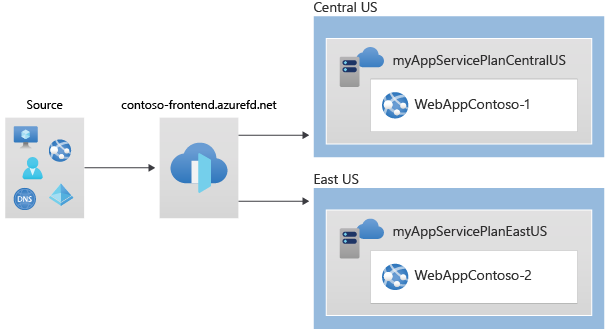
Azure Front Door pools two instances of a web application that run in different Azure regions. You create a Front Door configuration based on equal-weighted and same priority backends. This configuration directs traffic to the nearest site that runs the application. Azure Front Door continuously monitors the web application. The service provides automatic failover to the next available site when the nearest site is unavailable.
Prerequisites
- An Azure account with an active subscription. Create an account for free.
Create two instances of a web app
This quickstart requires two instances of a web application that run in different Azure regions. Both the web application instances run in Active/Active mode, so either one can take traffic. This configuration differs from an Active/Stand-By configuration, where one acts as a failover.
If you don't already have a web app, use the following steps to set up example web apps.
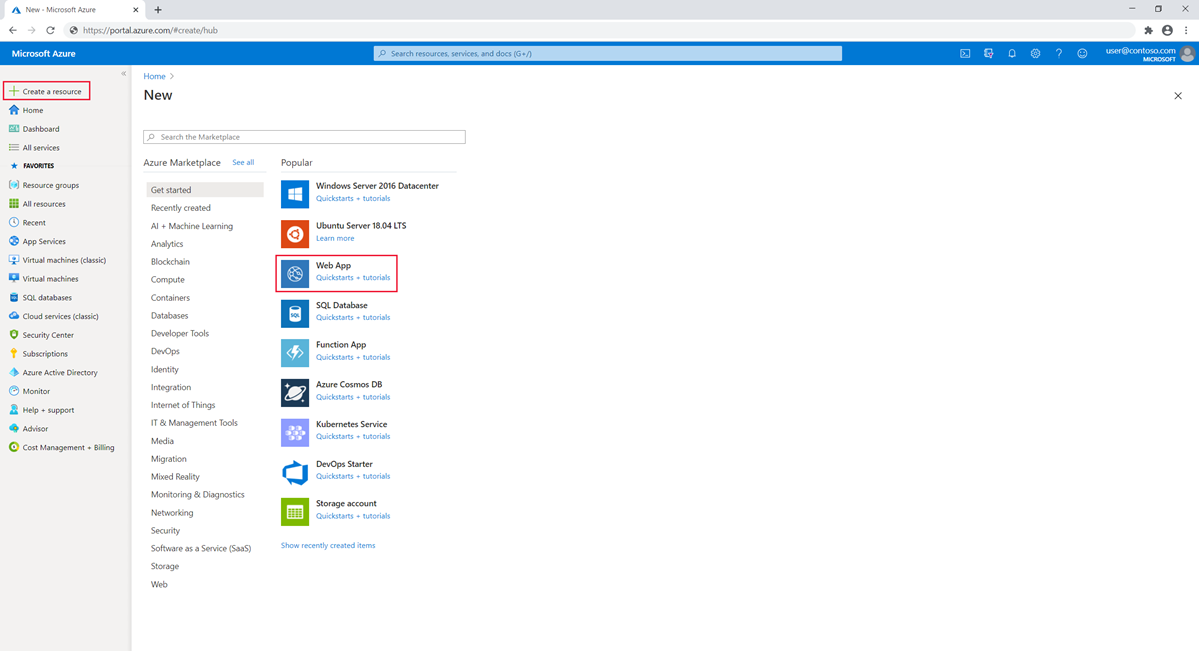
Sign in to the Azure portal at https://portal.azure.com.
On the top left-hand side of the screen, select Create a resource > WebApp.
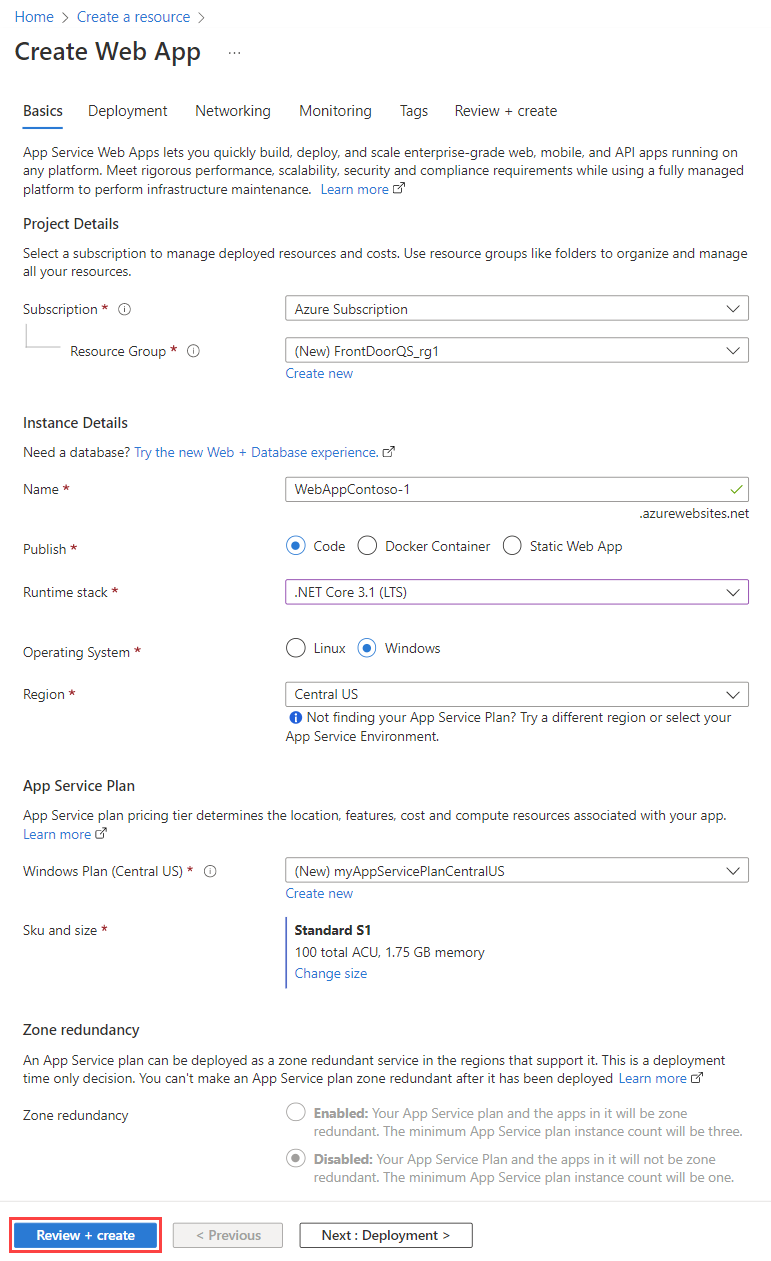
In the Basics tab of Create Web App page, enter or select the following information.
Select Review + create, review the Summary, and then select Create. It might take several minutes for the deployment to complete.
After your deployment is complete, create a second web app. Use the same procedure with the same values, except for the following values:
Create a Front Door for your application
Configure Azure Front Door to direct user traffic based on lowest latency between the two web apps servers. To begin, add a frontend host for Azure Front Door.
From the home page or the Azure menu, select Create a resource. Select Networking > See All > Front Door.
In the Basics tab of Create a Front Door page, enter or select the following information, and then select Next: Configuration.
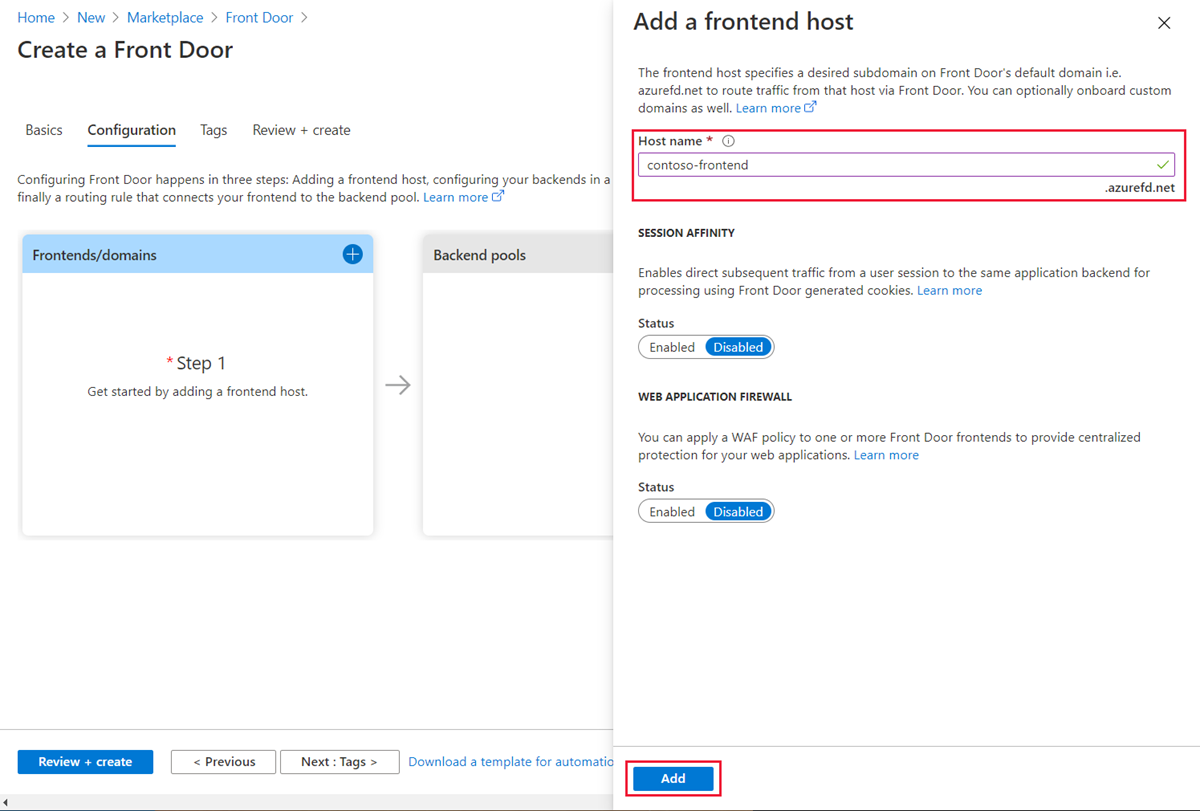
In Frontends/domains, select + to open Add a frontend host.
For Host name, enter a globally unique hostname. This example uses contoso-frontend. Select Add.
Next, create a backend pool that contains your two web apps.
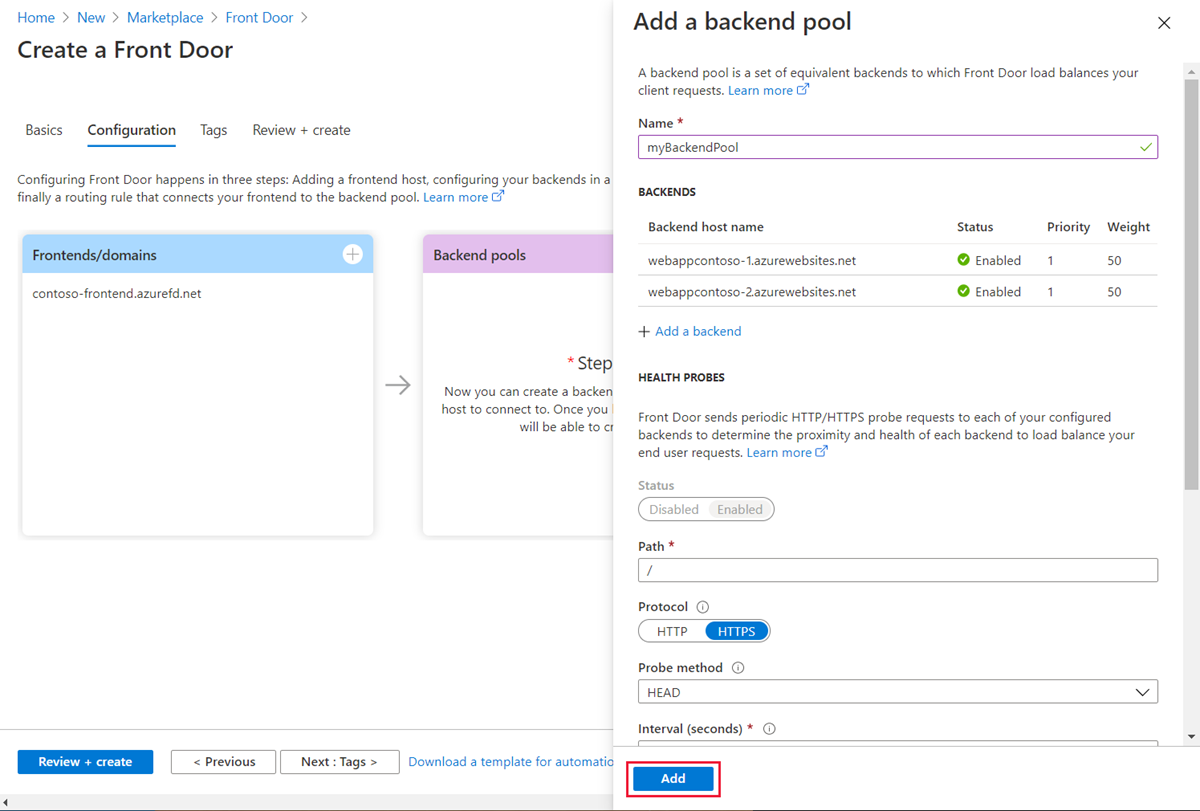
Still in Create a Front Door, in Backend pools, select + to open Add a backend pool.
For Name, enter myBackendPool, then select Add a backend.

In the Add a backend blade, select the following information and select Add.
*Leave all other fields default.

Select Add a backend again. select the following information and select Add.
*Leave all other fields default.
Select Add on the Add a backend pool blade to complete the configuration of the backend pool.
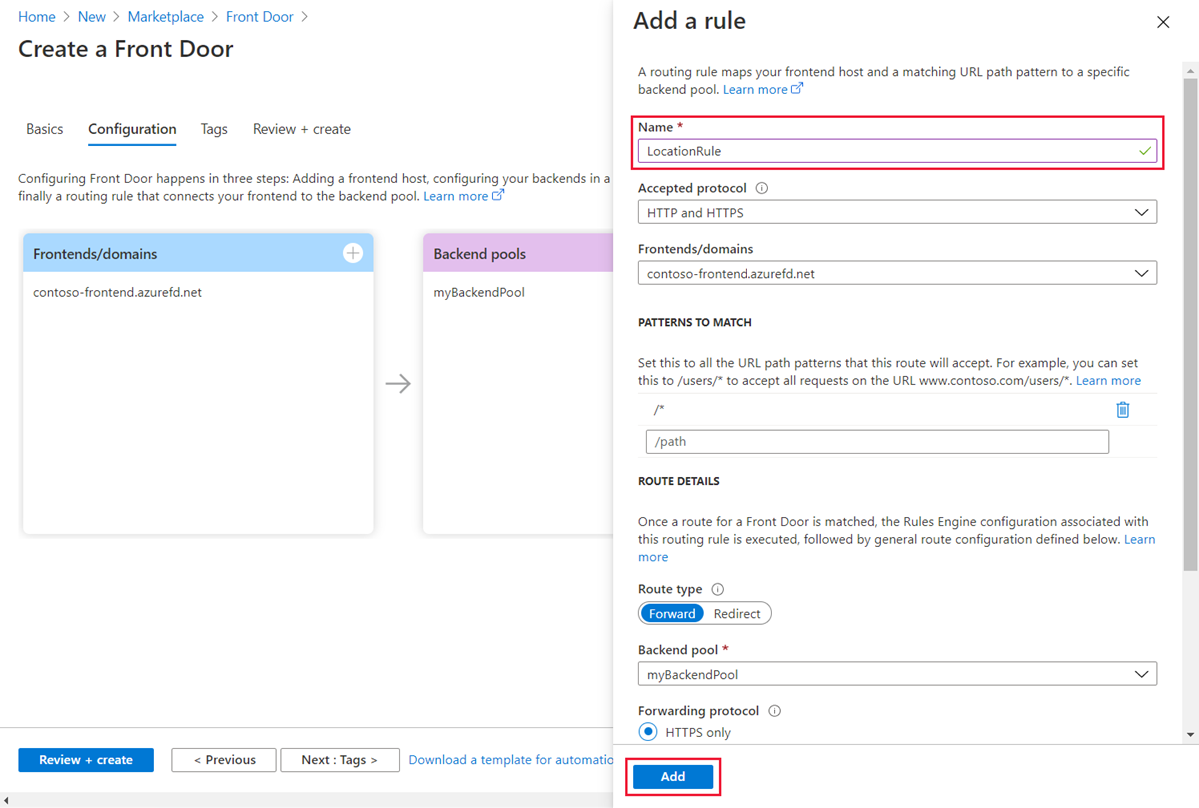
Finally, add a routing rule. A routing rule maps your frontend host to the backend pool. The rule forwards a request for contoso-frontend.azurefd.net to myBackendPool.
Still in Create a Front Door, in Routing rules, select + to configure a routing rule.
In Add a rule, for Name, enter LocationRule. Accept all the default values, then select Add to add the routing rule.
Warning
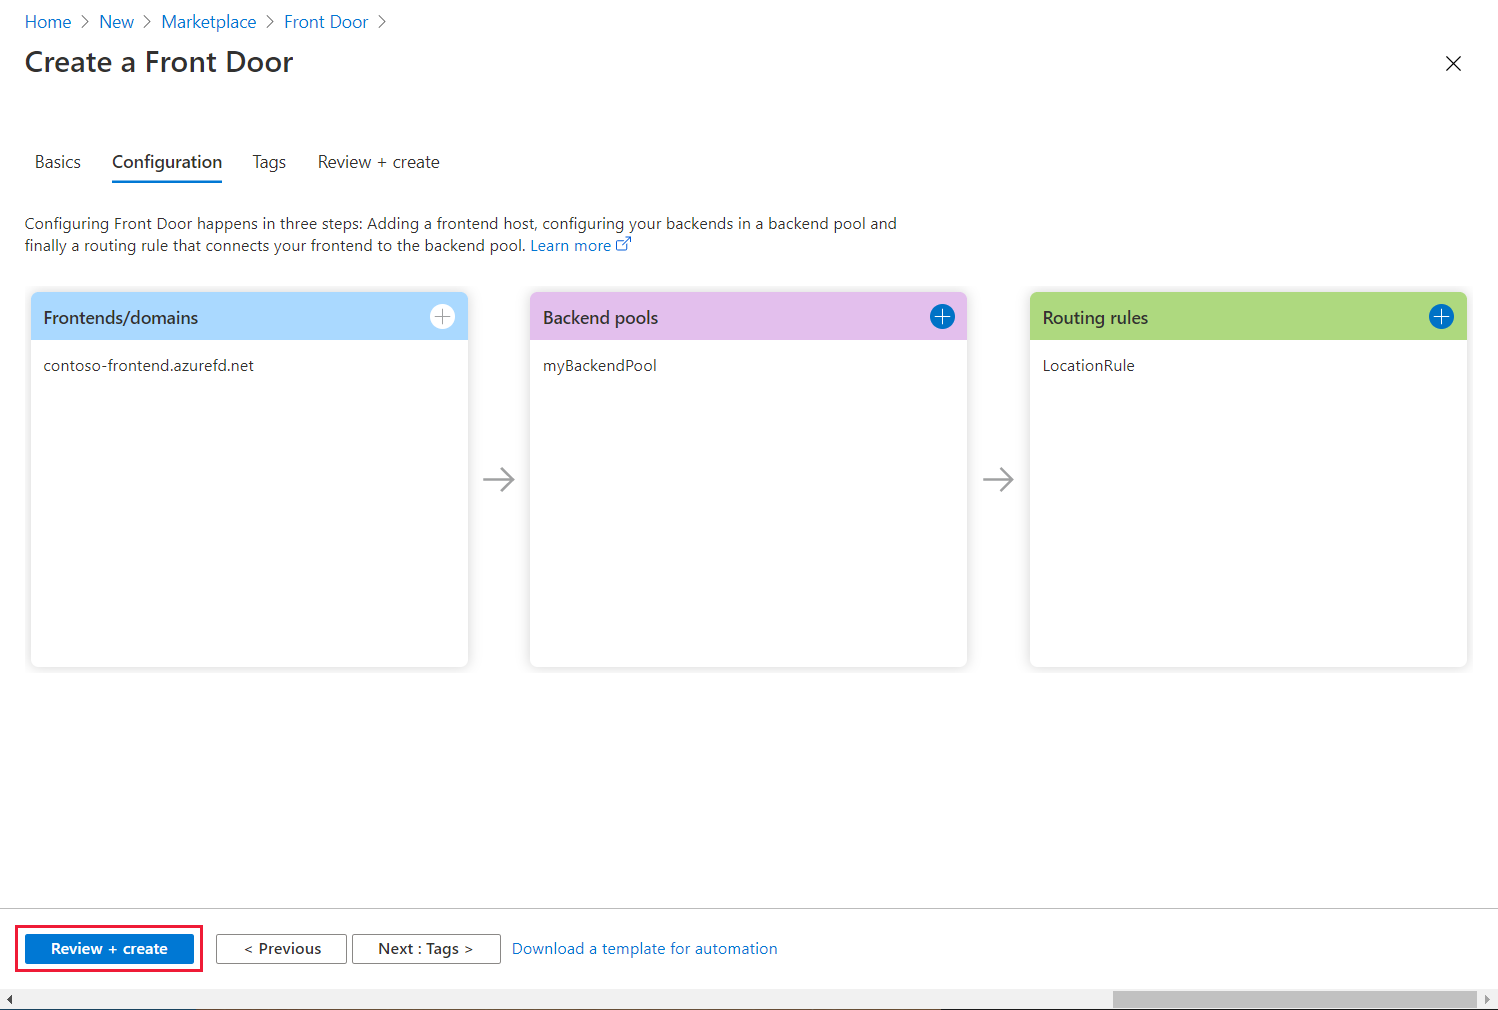
You must ensure that each of the frontend hosts in your Front Door has a routing rule with a default path (
/*) associated with it. That is, across all of your routing rules there must be at least one routing rule for each of your frontend hosts defined at the default path (/*). Failing to do so may result in your end-user traffic not getting routed correctly.Select Review + Create, and then Create.
View Azure Front Door in action
Once you create a Front Door, it takes a few minutes for the configuration to be deployed globally. Once complete, access the frontend host you created. In a browser, go to contoso-frontend.azurefd.net. Your request will automatically get routed to the nearest server to you from the specified servers in the backend pool.
If you created these apps in this quickstart, you'll see an information page.
To test instant global failover in action, try the following steps:
Open a browser, as described above, and go to the frontend address:
contoso-frontend.azurefd.net.In the Azure portal, search for and select App services. Scroll down to find one of your web apps, WebAppContoso-1 in this example.
Select your web app, and then select Stop, and Yes to verify.
Refresh your browser. You should see the same information page.
Tip
There is a little bit of delay for these actions. You might need to refresh again.
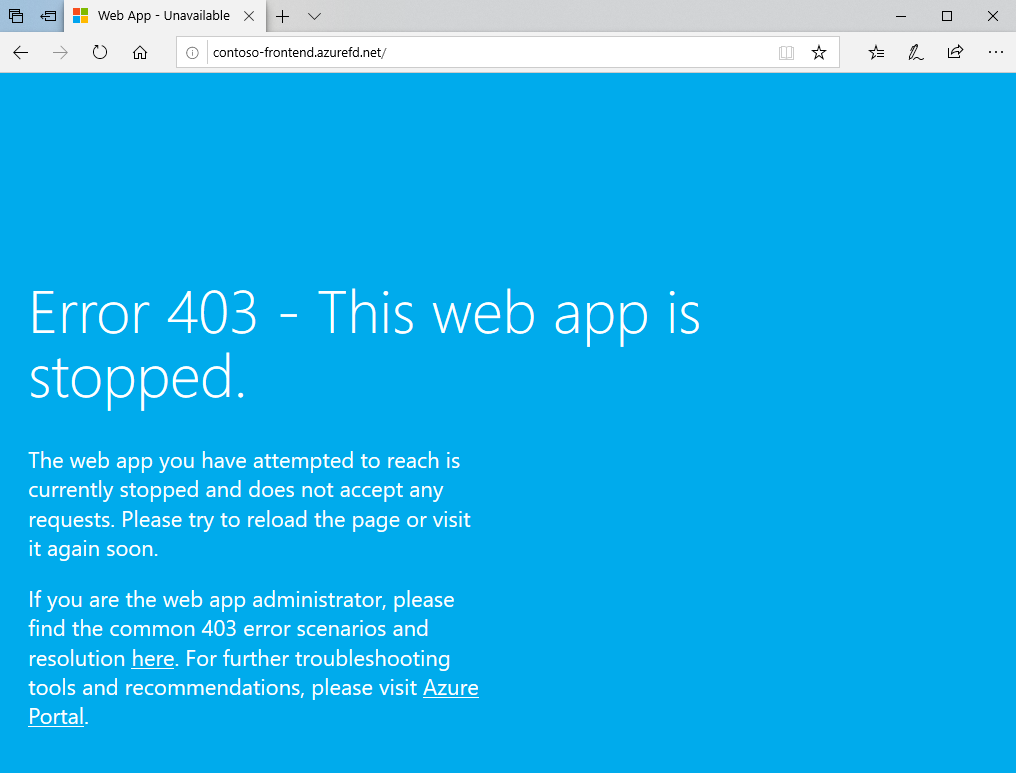
Find the other web app, and stop it as well.
Refresh your browser. This time, you should see an error message.
Clean up resources
After you're done, you can remove all the items you created. Deleting a resource group also deletes its contents. If you don't intend to use this Front Door, you should remove resources to avoid unnecessary charges.
In the Azure portal, search for and select Resource groups, or select Resource groups from the Azure portal menu.
Filter or scroll down to find a resource group, such as FrontDoorQS_rg0.
Select the resource group, then select Delete resource group.
Warning
This action is irreversable.
Type the resource group name to verify, and then select Delete.
Repeat the procedure for the other two groups.
No comments:
Post a Comment