Get started with Azure DDoS Protection Standard by using the Azure portal.
A DDoS protection plan defines a set of virtual networks that have DDoS Protection Standard enabled, across subscriptions. You can configure one DDoS protection plan for your organization and link virtual networks from multiple subscriptions under a single AAD tenant to the same plan.
In this quickstart, you'll create a DDoS protection plan and link it to a virtual network.
Prerequisites
- If you don't have an Azure subscription, create a free account before you begin.
- Sign in to the Azure portal at https://portal.azure.com. Ensure that your account is assigned to the network contributor role or to a custom role that is assigned the appropriate actions listed in the how-to guide on Permissions.
Create a DDoS protection plan
Select Create a resource in the upper left corner of the Azure portal.
Search the term DDoS. When DDoS protection plan appears in the search results, select it.
Select Create.
Enter or select the following values.
Setting Value Subscription Select your subscription. Resource group Select Create new and enter MyResourceGroup. Name Enter MyDdosProtectionPlan. Region Enter East US. Select Review + create then Create
Note
Although DDoS Protection Plan resources needs to be associated with a region, users can enable DDoS protection on Virtual Networks in different regions and across multiple subscriptions under a single Azure Active Directory Tenant.
Enable DDoS protection for a virtual network
Enable DDoS protection for a new virtual network
Select Create a resource in the upper left corner of the Azure portal.
Select Networking, and then select Virtual network.
Enter or select the following values.
Setting Value Subscription Select your subscription. Resource group Select Use existing, and then select MyResourceGroup Name Enter MyVnet. Region Enter East US. Select Next: IP Addresses and enter the following values.
Setting Value IPv4 address space Enter 10.1.0.0/16. Subnet name Under Subnet name, select the Add subnet link and enter mySubnet. Subnet address range Enter 10.1.0.0/24. Select Add.
Select Next: Security.
Select Enable on the DDoS Protection Standard radio.
Select MyDdosProtectionPlan from the DDoS protection plan pane. The plan you select can be in the same, or different subscription than the virtual network, but both subscriptions must be associated to the same Azure Active Directory tenant.
Select Review + create then Create.
Note
You cannot move a virtual network to another resource group or subscription when DDoS Standard is enabled for the virtual network. If you need to move a virtual network with DDoS Standard enabled, disable DDoS Standard first, move the virtual network, and then enable DDoS standard. After the move, the auto-tuned policy thresholds for all the protected public IP addresses in the virtual network are reset.
Enable DDoS protection for an existing virtual network
- Create a DDoS protection plan by completing the steps in Create a DDoS protection plan, if you don't have an existing DDoS protection plan.
- Enter the name of the virtual network that you want to enable DDoS Protection Standard for in the Search resources, services, and docs box at the top of the Azure portal. When the name of the virtual network appears in the search results, select it.
- Select DDoS protection, under Settings.
- Select Enable. Under DDoS protection plan, select an existing DDoS protection plan, or the plan you created in step 1, and then click Save. The plan you select can be in the same, or different subscription than the virtual network, but both subscriptions must be associated to the same Azure Active Directory tenant.
You can also enable the DDoS protection plan for an existing virtual network from the DDoS Protection plan, not from the virtual network.
- Search for "DDoS protection plans" in the Search resources, services, and docs box at the top of the Azure portal. When DDoS protection plans appears in the search results, select it.
- Select the desired DDoS protection plan you want to enable for your virtual network.
- Select Protected resources under Settings.
- Click +Add and select the right subscription, resource group and the virtual network name. Click Add again.
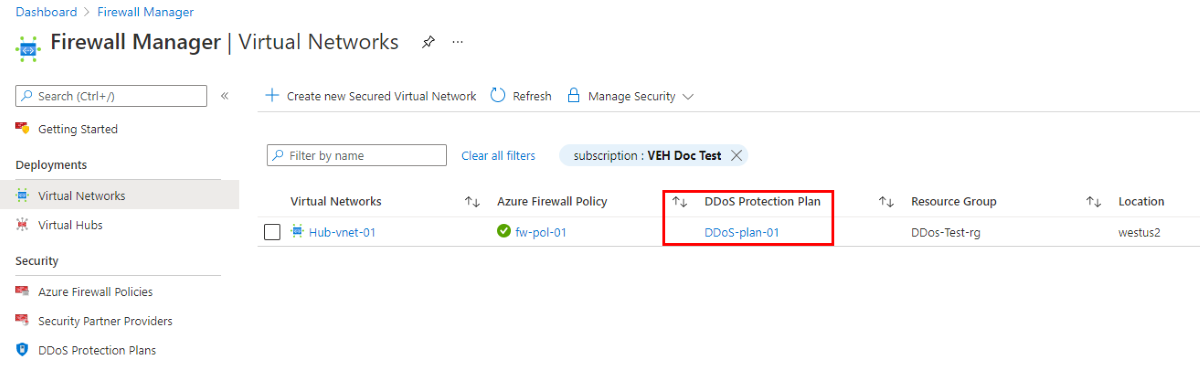
Configure an Azure DDoS Protection Plan using Azure Firewall Manager (preview)
Azure Firewall Manager is a platform to manage and protect your network resources at scale. You can associate your virtual networks with a DDoS protection plan within Azure Firewall Manager. This functionality is currently available in Public Preview. See Configure an Azure DDoS Protection Plan using Azure Firewall Manager.
Enable DDoS protection for all virtual networks
This built-in policy will detect any virtual networks in a defined scope that don't have DDoS Protection Standard enabled. This policy will then optionally create a remediation task that will create the association to protect the Virtual Network. See Azure Policy built-in definitions for Azure DDoS Protection Standard for full list of built-in policies.
Validate and test
First, check the details of your DDoS protection plan:
- Select All services on the top, left of the portal.
- Enter DDoS in the Filter box. When DDoS protection plans appear in the results, select it.
- Select your DDoS protection plan from the list.
The MyVnet virtual network should be listed.
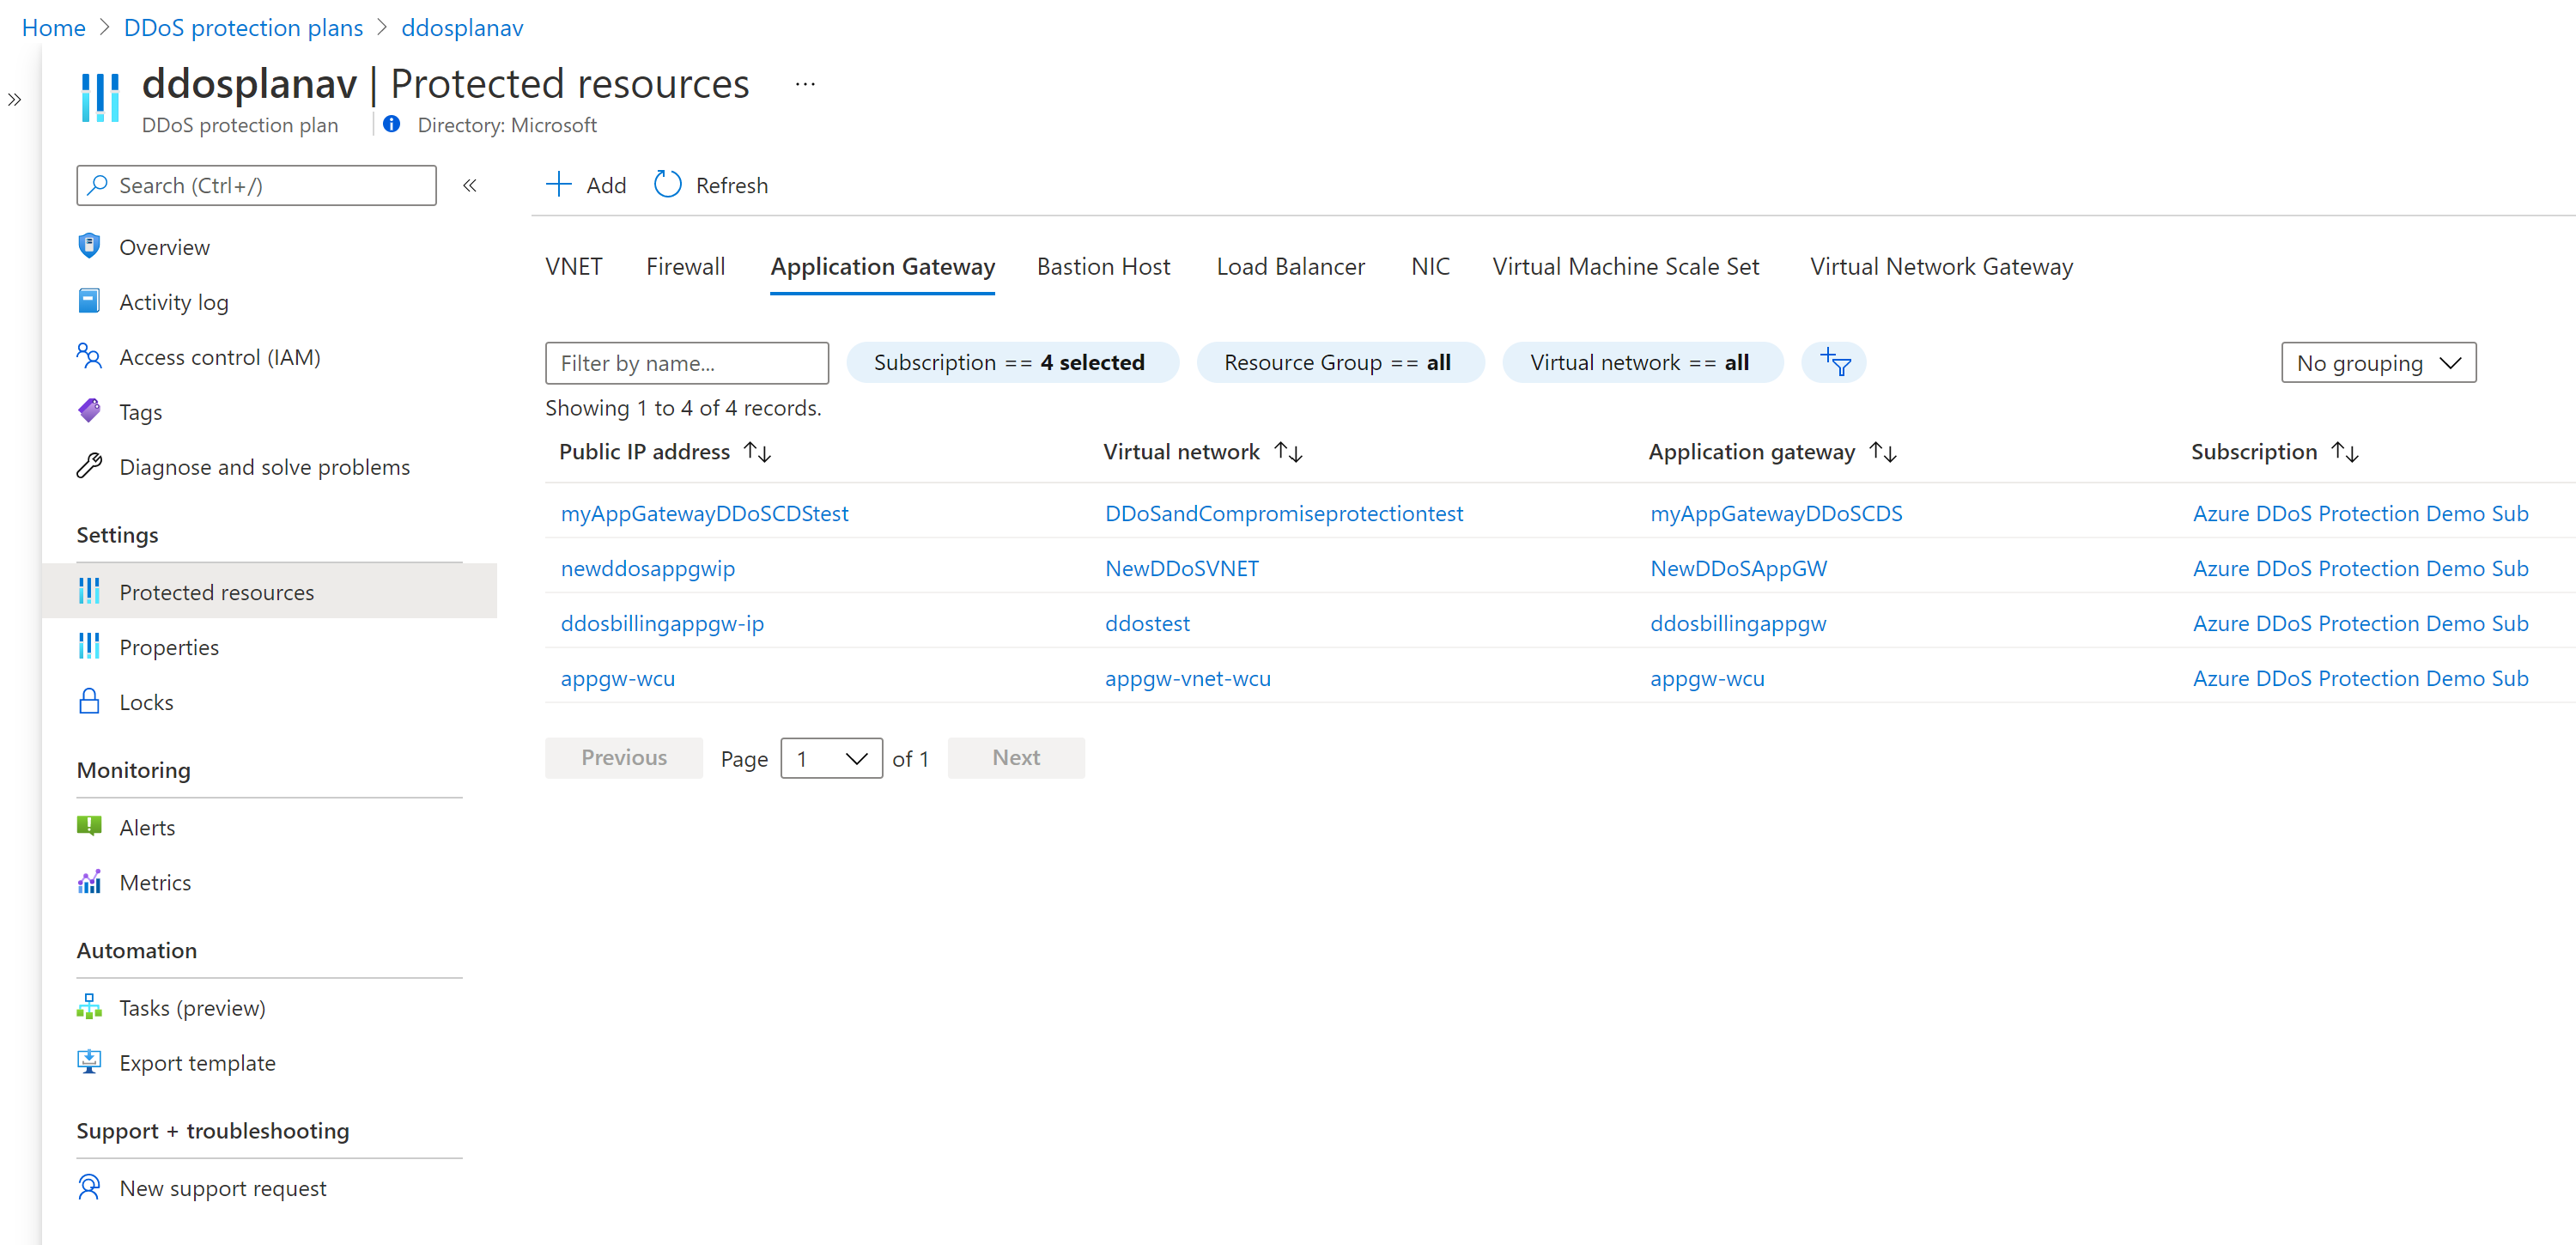
View protected resources
Under Protected resources, you can view your protected virtual networks and public IP addresses, or add more virtual networks to your DDoS protection plan:
Clean up resources
You can keep your resources for the next tutorial. If no longer needed, delete the MyResourceGroup resource group. When you delete the resource group, you also delete the DDoS protection plan and all its related resources. If you don't intend to use this DDoS protection plan, you should remove resources to avoid unnecessary charges.
Warning
This action is irreversible.
In the Azure portal, search for and select Resource groups, or select Resource groups from the Azure portal menu.
Filter or scroll down to find the MyResourceGroup resource group.
Select the resource group, then select Delete resource group.
Type the resource group name to verify, and then select Delete.
To disable DDoS protection for a virtual network:
- Enter the name of the virtual network you want to disable DDoS protection standard for in the Search resources, services, and docs box at the top of the portal. When the name of the virtual network appears in the search results, select it.
- Under DDoS Protection Standard, select Disable.
Note:
If you want to delete a DDoS protection plan, you must first dissociate all virtual networks from it.
No comments:
Post a Comment