GIMP Edit menu provides several useful image editing options. It provides basic image editing options such as cut, copy, paste, fill, clear, etc. It contains the following options:
- Undo
- Redo
- Undo History
- Cut
- Copy
- Copy Visible
- Paste
- Paste In Place
- Paste Into Selection
- Paste Into In Place
- Paste As
- Buffer
- Clear
- Fill with FG Color
- Fill with BG Color
- Fill with Pattern
- Fill Selection Outline
- Fill Path
- Stroke Selection
- Stroke Path
- Preferences
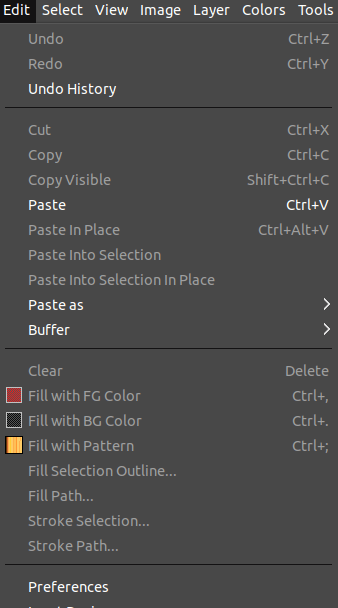
Let's understand each tool:
Undo
The Undo tool is used to undo the last change and return the image to its previous state. It is a fundamental utility that performs multiple times during an image manipulation task. GIMP supports multiple undo options so we can perform multiple undo operations and get the image to its earlier states.
To undo a change, select undo from the edit menu or stroke the CTRL+Z keys.
Redo
The Redo tool is opposite to undo; it will return the image to its next state (if any). The redo operations can reverse the undo operations. Just like undo, GIMP supports multiple redo operations. If you make any changes after the last undo operation, you will lose the previous redo steps.
To redo a undo operation, select redo from the edit menu or stroke the CTRL+Y keys.
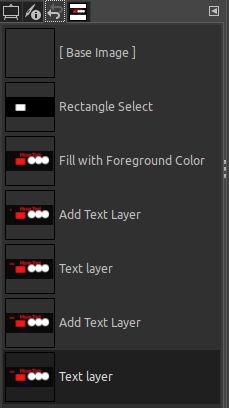
Undo History
The Undo History tool lets see the done and undone operations. It displays a list of the most recently performed actions with a small sketch. You can select any state of the image from this list. The undo history panel can be seen at the below of the toolbox in the toolbox options. It will look like:
Cut
The cut tool is used to delete the selection or a part of the image, and save them in the clipboard. Later, it can be pasted using the paste option. If there is no specific selection, it will cut the entire layer. The area where the cut operation is performed will be left transparent if it has an alpha channel; otherwise, it will be filled with BG color.
To cut a selection, select the cut tool from the edit menu or stroke the CTRL+X keys.
Copy
The copy tool is used to copy the current selection and stores it in the clipboard. Later, it can be used by the paste option. If there is no selection, it will copy the entire layer. The copy action acts on the current layer. It will not work for the top or down layers.
To copy a selection, select the copy tool form the edit menu or stroke the CTRL+C keys.
Copy Visible
The Copy Visible tools are used to copy the content of visible layers. It is similar to copy but, it also copies the content except for the active layer.
To copy the visible content, select the copy visible option form the edit menu or stroke the SHIFT+CTRL+C keys.
Paste
The paste tool is used to paste the content from the clipboard stored by a copy or cut tool. The pasted selection is stored as a floating selection, which means it will be shown as a separate layer.
To paste the copied content, select the paste option from the editing menu or stroke the CTRL+V keys.
Paste In Place
The regular paste tool is used to place the content into the center of the canvas, but this tool is used to place the content at the exact coordinate location.
Paste Into Selection
The Paste Into Selection tool is used to place the content into a selection. It is similar to the paste tool; the difference is created if there is a selection within the image. If there is no selection, it will paste the data into the center of the canvas.
Paste Into In Place
The Paste Into In-Place tool is used to place the content at the exact coordinates; the content was initially copied. It pastes at the center of the selection. To activate the paste into in selection tool, select it from the edit menu.
Paste As
The paste as the command is also used to copy the content from the clipboard. But, it provides the following sub-options for pasting the contents:
Paste as:
- New Layer
- New Layer In Place
- New Image
- New Brush
- New Pattern

New Layer: It creates a new layer on the current image and places the content into it. If the selection is not in a specific shape, the edge that does not extend to the edge is left transparent. It will automatically create an alpha channel.
New Layer In Place: It is used to create a new layer and place it at the exact coordinates; the content was initially copied.
New Image: It is used to create a new image and place the copied data into it. If the selection is not in a specific shape, the edge that does not extend to the edge is left transparent. It will automatically create an alpha channel. It has the same behavior as the File → Create → From Clipboard tool.
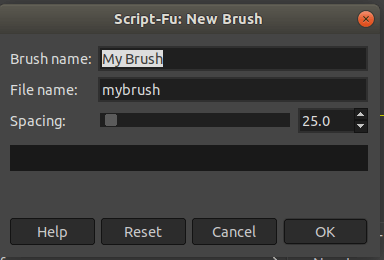
New Brush: It opens a dialog window that allows us to name the new brush.
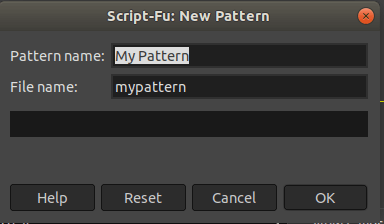
New Pattern: It opens a dialog window which let us name our new pattern.
Buffer
Buffers are created when we cut or copy an image content; it is a temporary repository for image data. The Buffer tool is used to save the data in this buffer. The buffer tool provides the following option to store the content in the buffer:
- Cut Named
- Copy Named
- Copy Visible Named
- Pasted Named

Cut Named: It cuts the selection content from an active layer and stores it in a specific buffer instead of the clipboard.
Copy Named: It copies the selected content from an active layer and stores it in a specific buffer instead of the clipboard.
Copy Visible Named: It copies the selected content from all the visible layers and stores it in a specific buffer instead of the clipboard.
Pasted Named: The Pasted Named tool lists the buffers. By selecting one of the given buffers, we can paste it with different paste options such as paste buffer, paste buffer into, and paste buffer as new.
Clear
The clear tool is used to delete the content from the current selection. If there is no specific selection, it will cut the entire active layer. If the layer has an alpha channel, it will become transparent.
Fill With FG Color
The Fill with FG Color tool is used to fill the current selection with the current foreground color. The rest area will be unaffected.

In the above image, we have filled a selection with the current foreground color. To fill the selection with the current foreground color, select the fill with FG color option from the edit menu or Stroke the CTRL+COMMA(,) Keys.
Fill With BG Color
The Fill With BG Color tool is used to fill the current layer selection with the current background color. It will not affect the rest part of the image or layer. To fill the selection with current background color, select the fill with BG color option from the edit menu or stroke the CTRL+ DOT (.) Keys.
Fill With Pattern
The Fill With Pattern tool is used to fill the selected region with the available pattern in the pattern area of the toolbox. It will not affected the rest part of the image.
Fill Selection Outline
The Fill Selection Outline tool is usually grayed out. It is activated when a selection exists. It will pop up the below window:
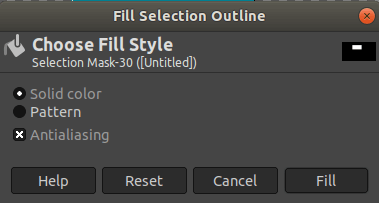
The solid color option will choose the active foreground color, and the pattern option will choose the current active pattern to fill the selection.
Fill Path
The Fill Path tool is usually grayed out. It will be activated when a path exists. It fills all areas delimited by the path from the origin to the end.
Stroke Selection
The Stoke Selection tool is used to create a borderline on the selection. There are various options to make the stroke more specific. We can choose the stroke style. It will pop up a window for specifying the stroke style:
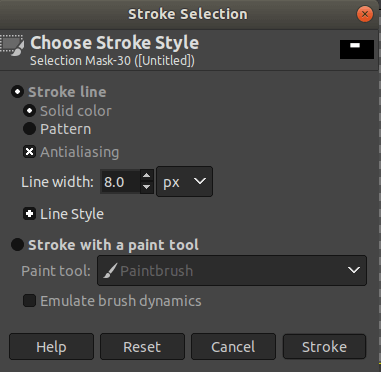
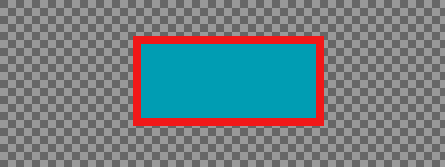
Below is the example of the stroke:
Stroke Path
The Stroke Path tool is used to stroke the path (if any).
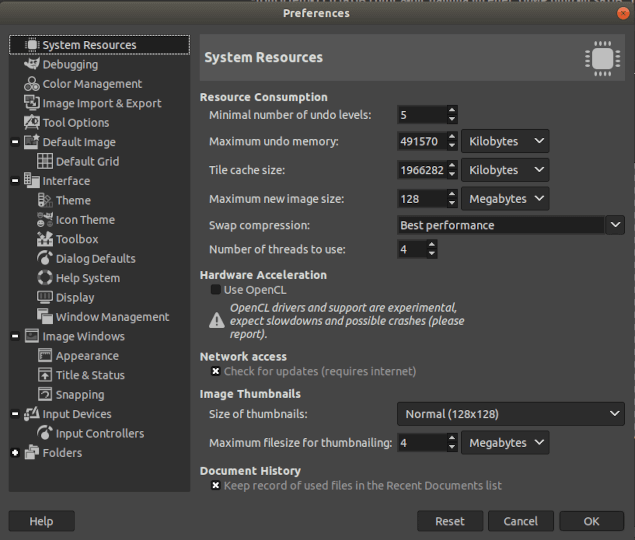
Preferences
The Preferences tool is used to alter the settings that affect the user interface and performance of the GIMP.
No comments:
Post a Comment